Detailed instructions to help you quickly master all features
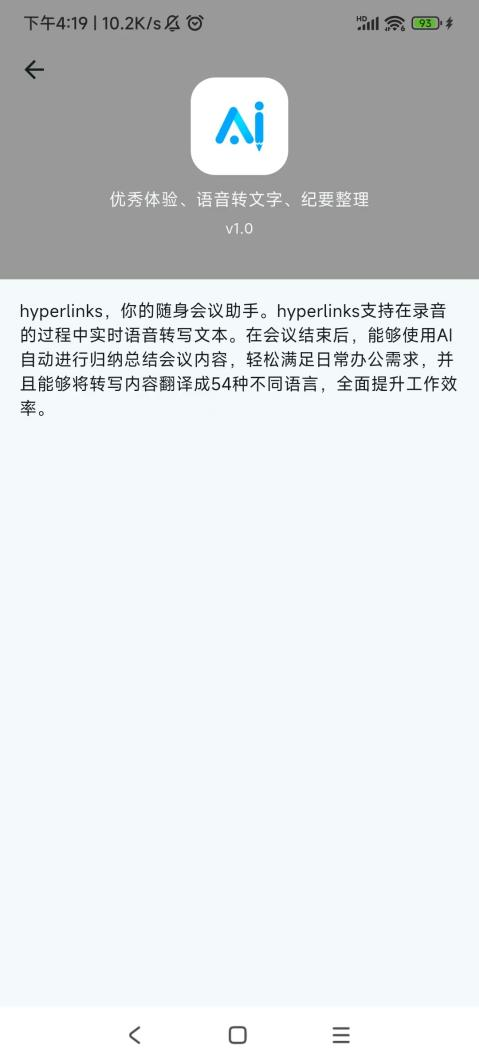
This operation guide demonstrates all the functions and usage methods of the Hyperlinks APP. Follow the steps below to easily master this professional voice-to-text and meeting minutes organization tool.
Please refer to the corresponding operation steps according to your actual needs.
Scan the QR code to download and install the Hyperlinks APP

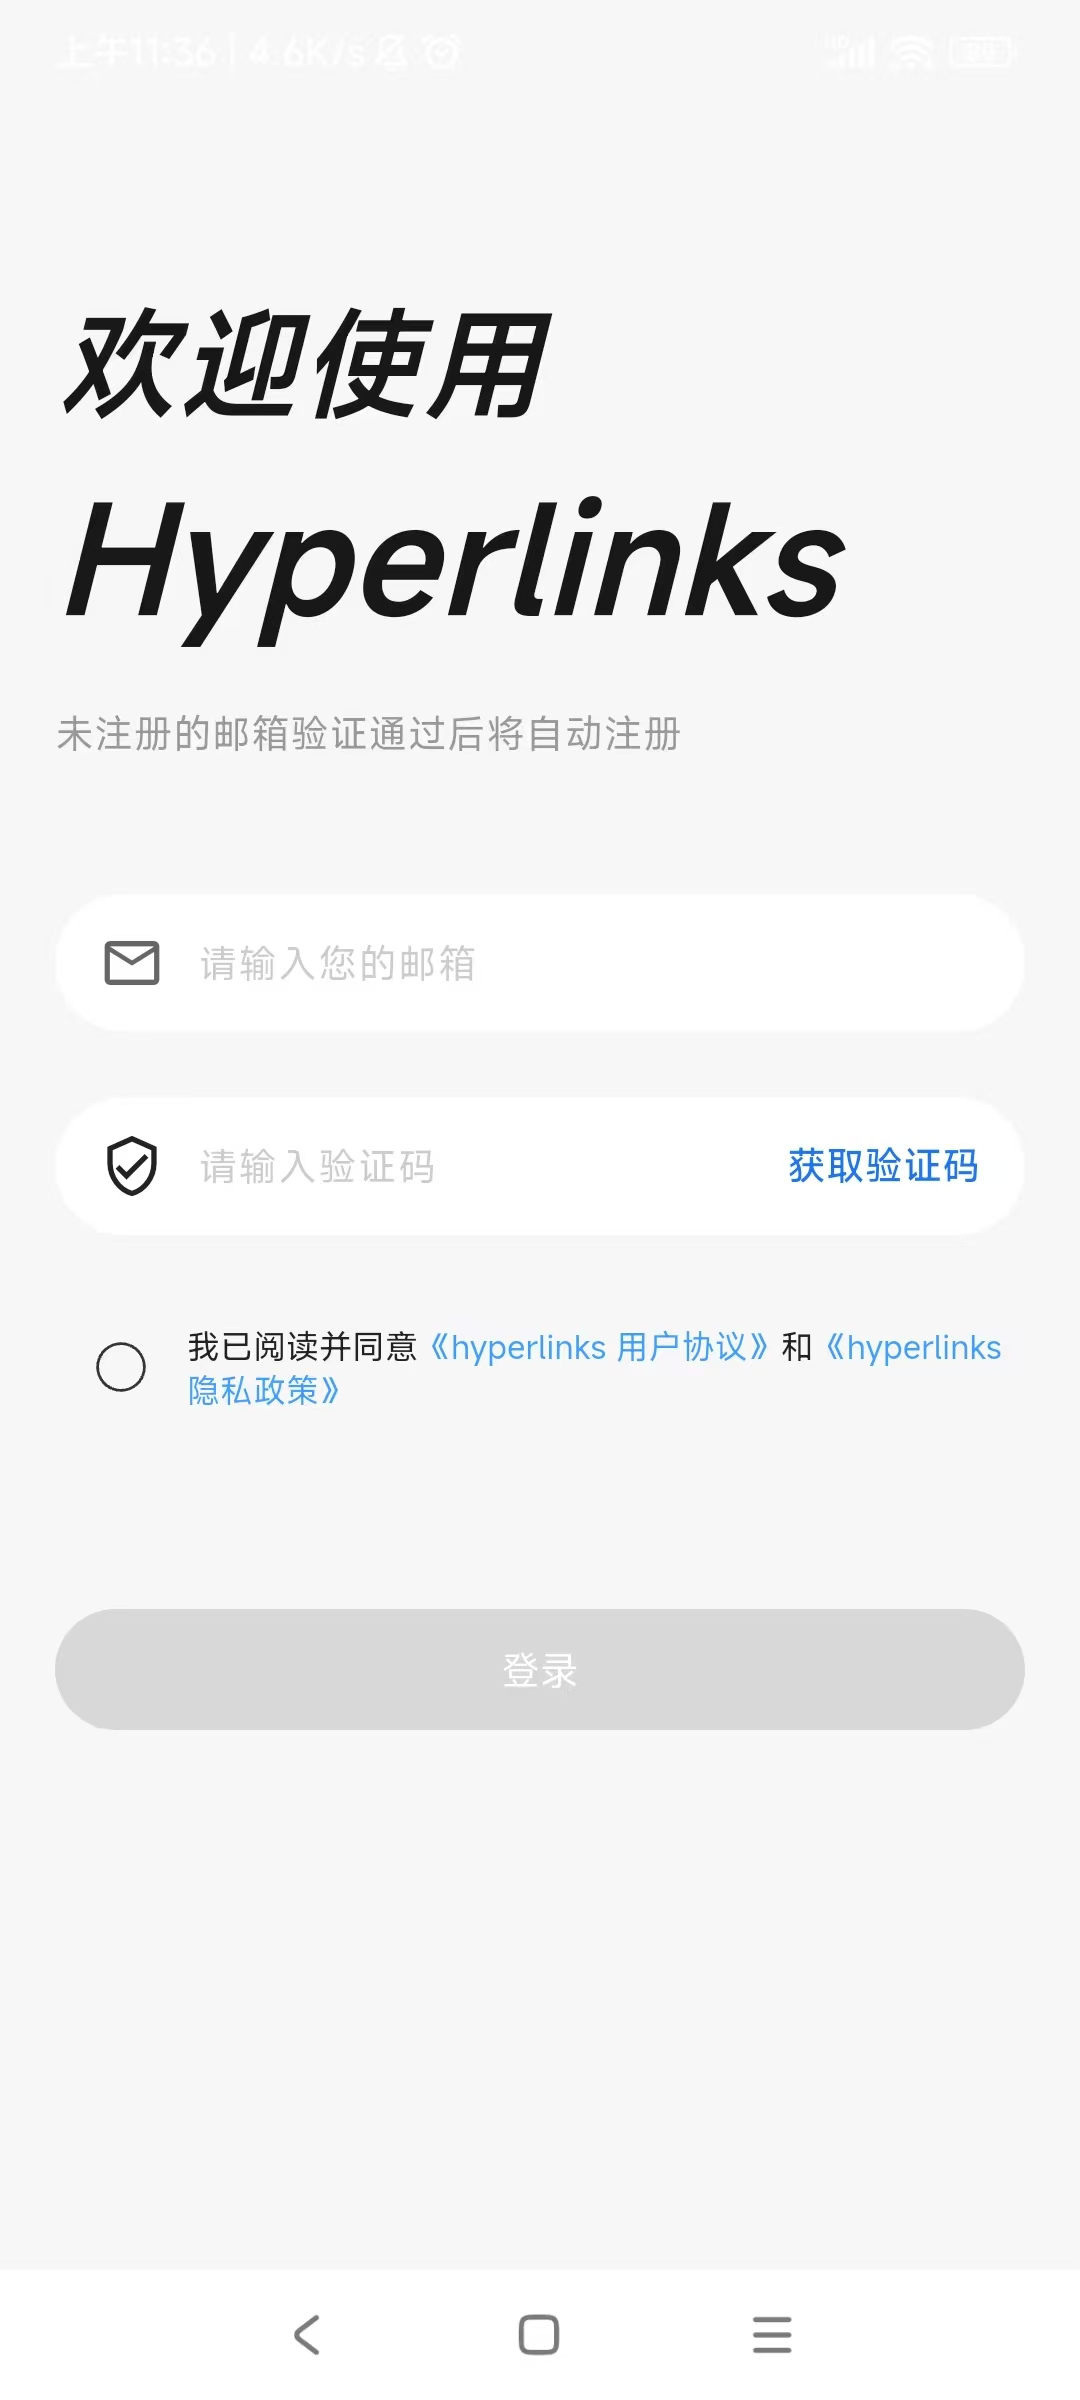
Open the Hyperlinks APP and log in with your email account:
• Enter your email
• Get the verification code
• Fill in the verification code received in your email
• Check the box to agree to the agreement and authorization
• Click the "Login" button to log in
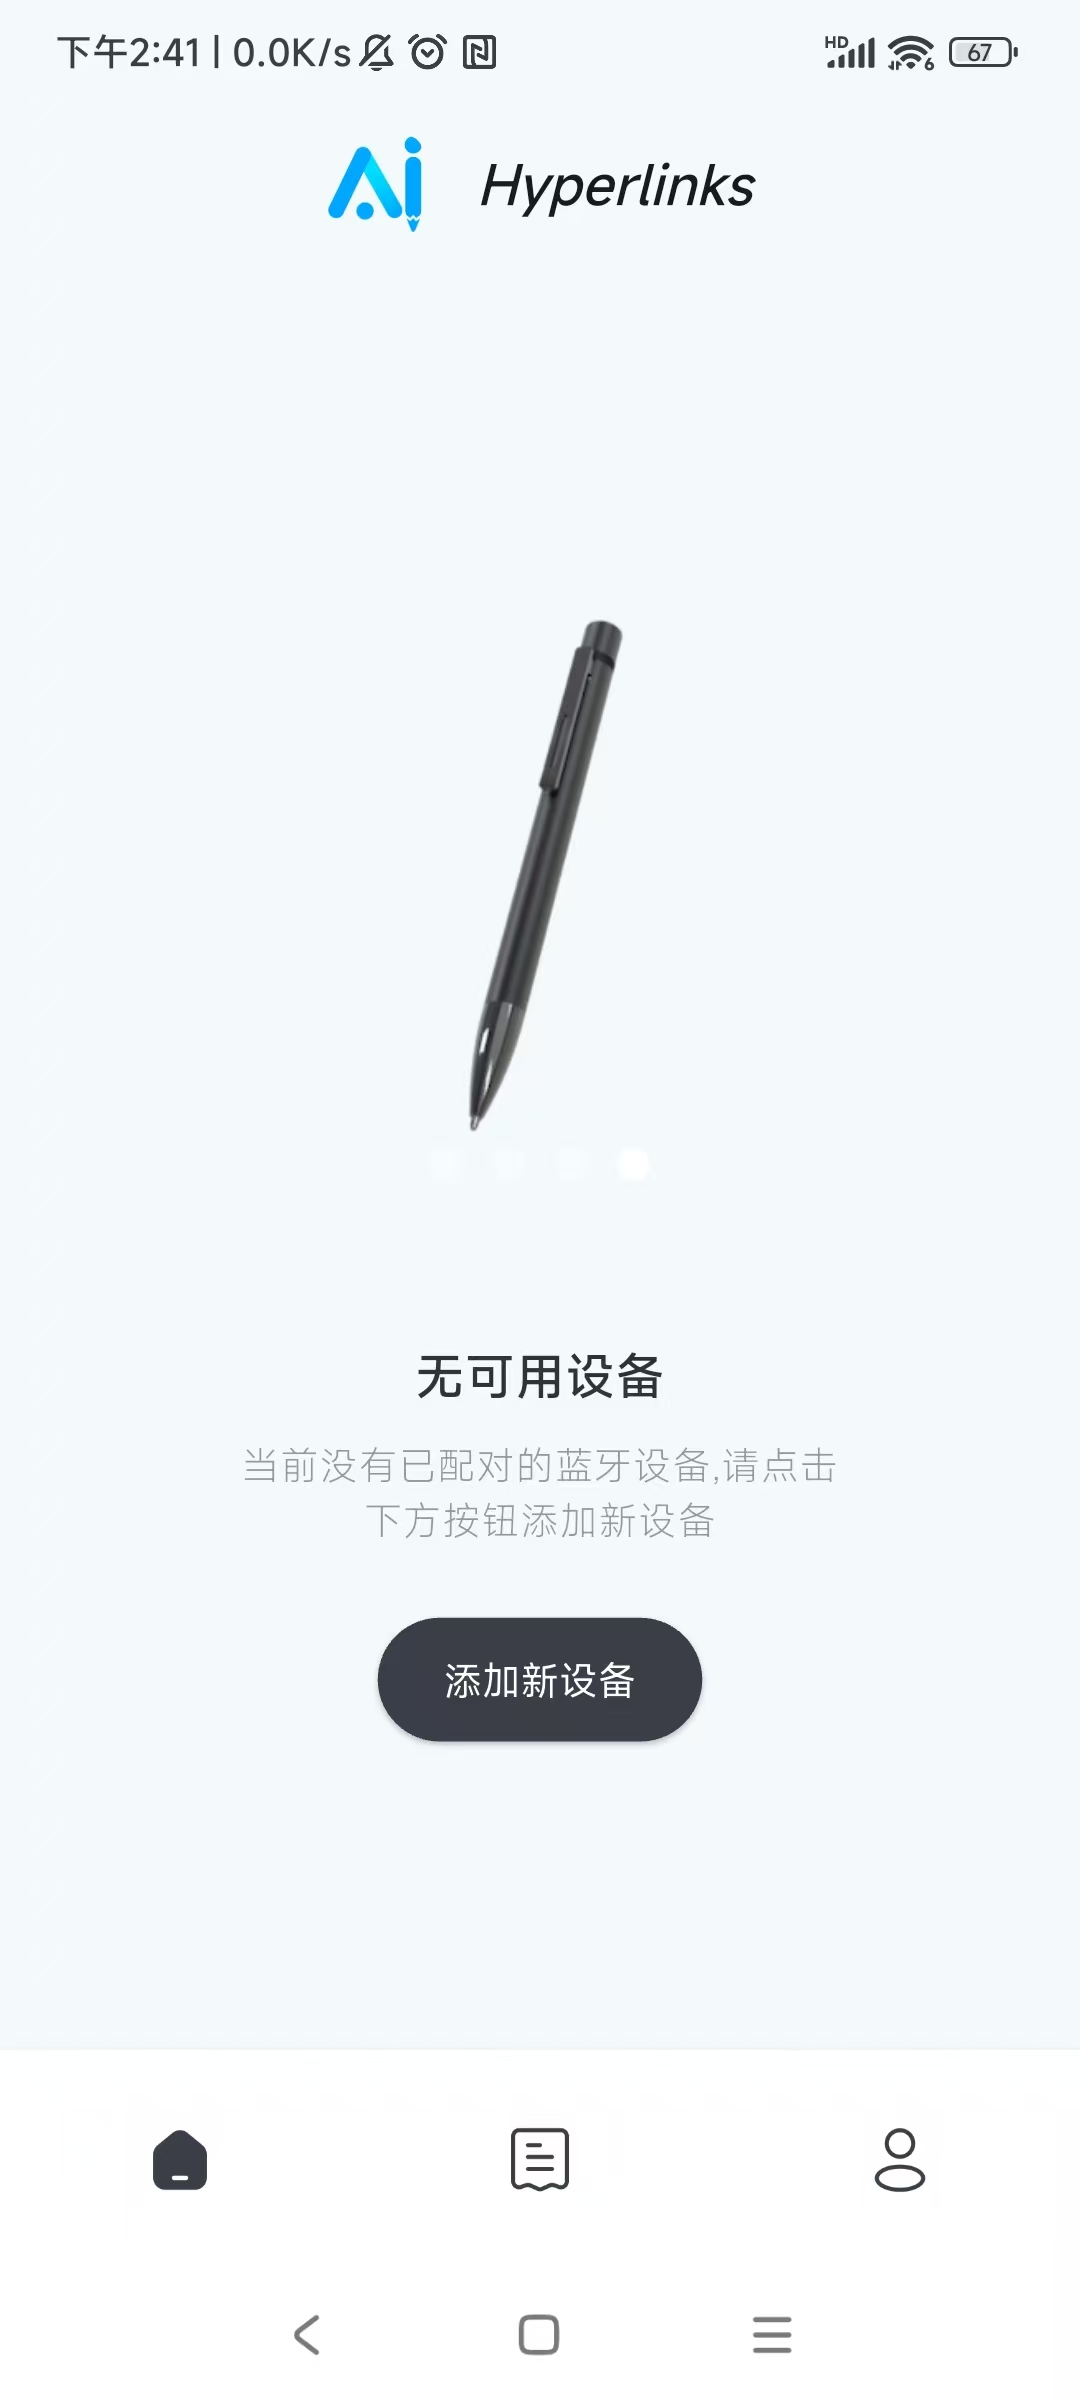
Enter the APP and authorize it:
• After entering the home page, authorize the APP to discover and connect to nearby devices

Click "Add New Device"
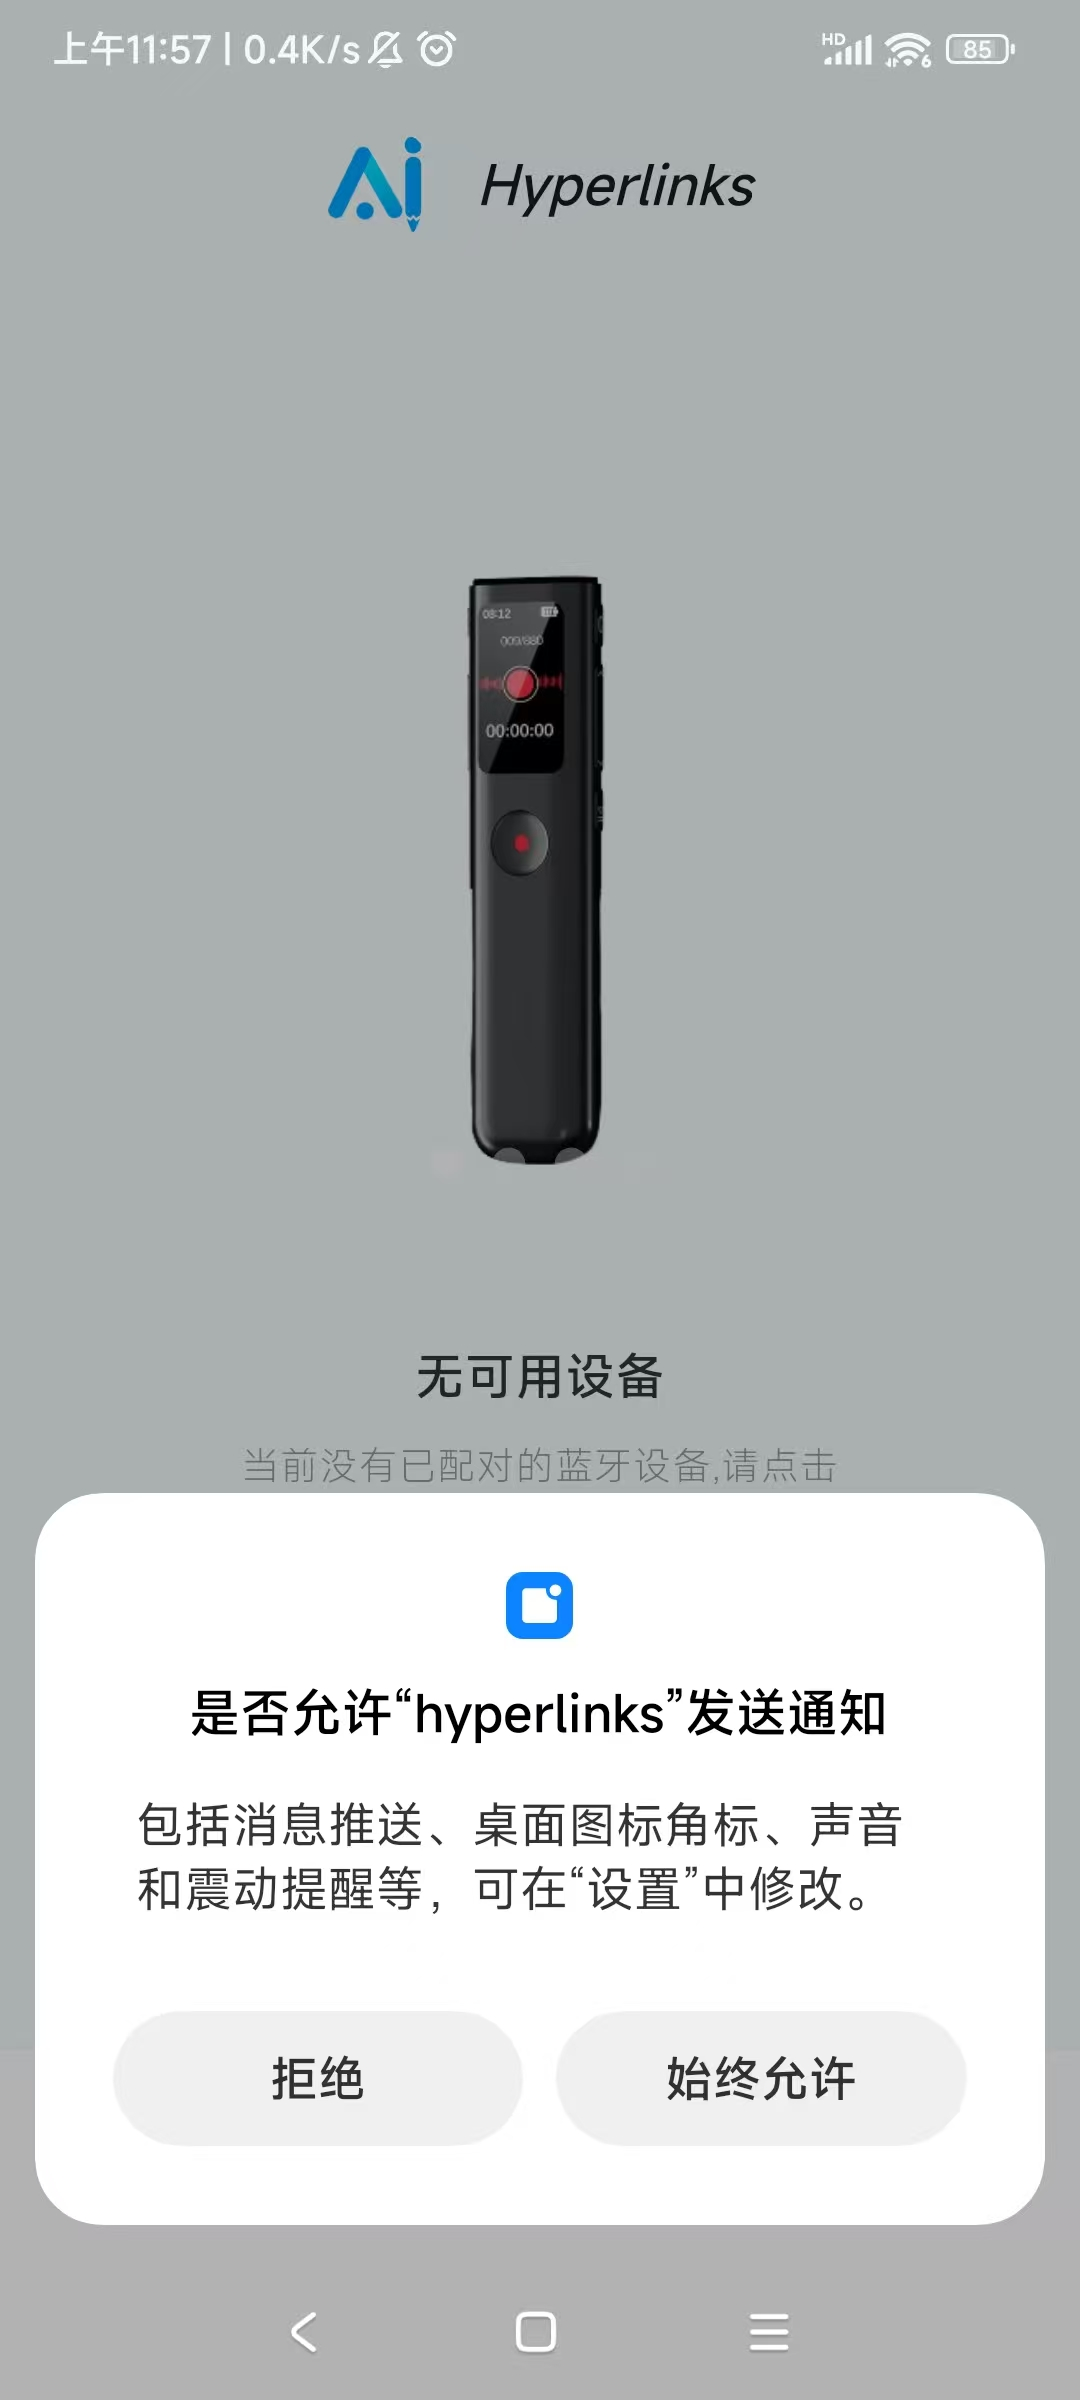
Authorize the APP to send notifications
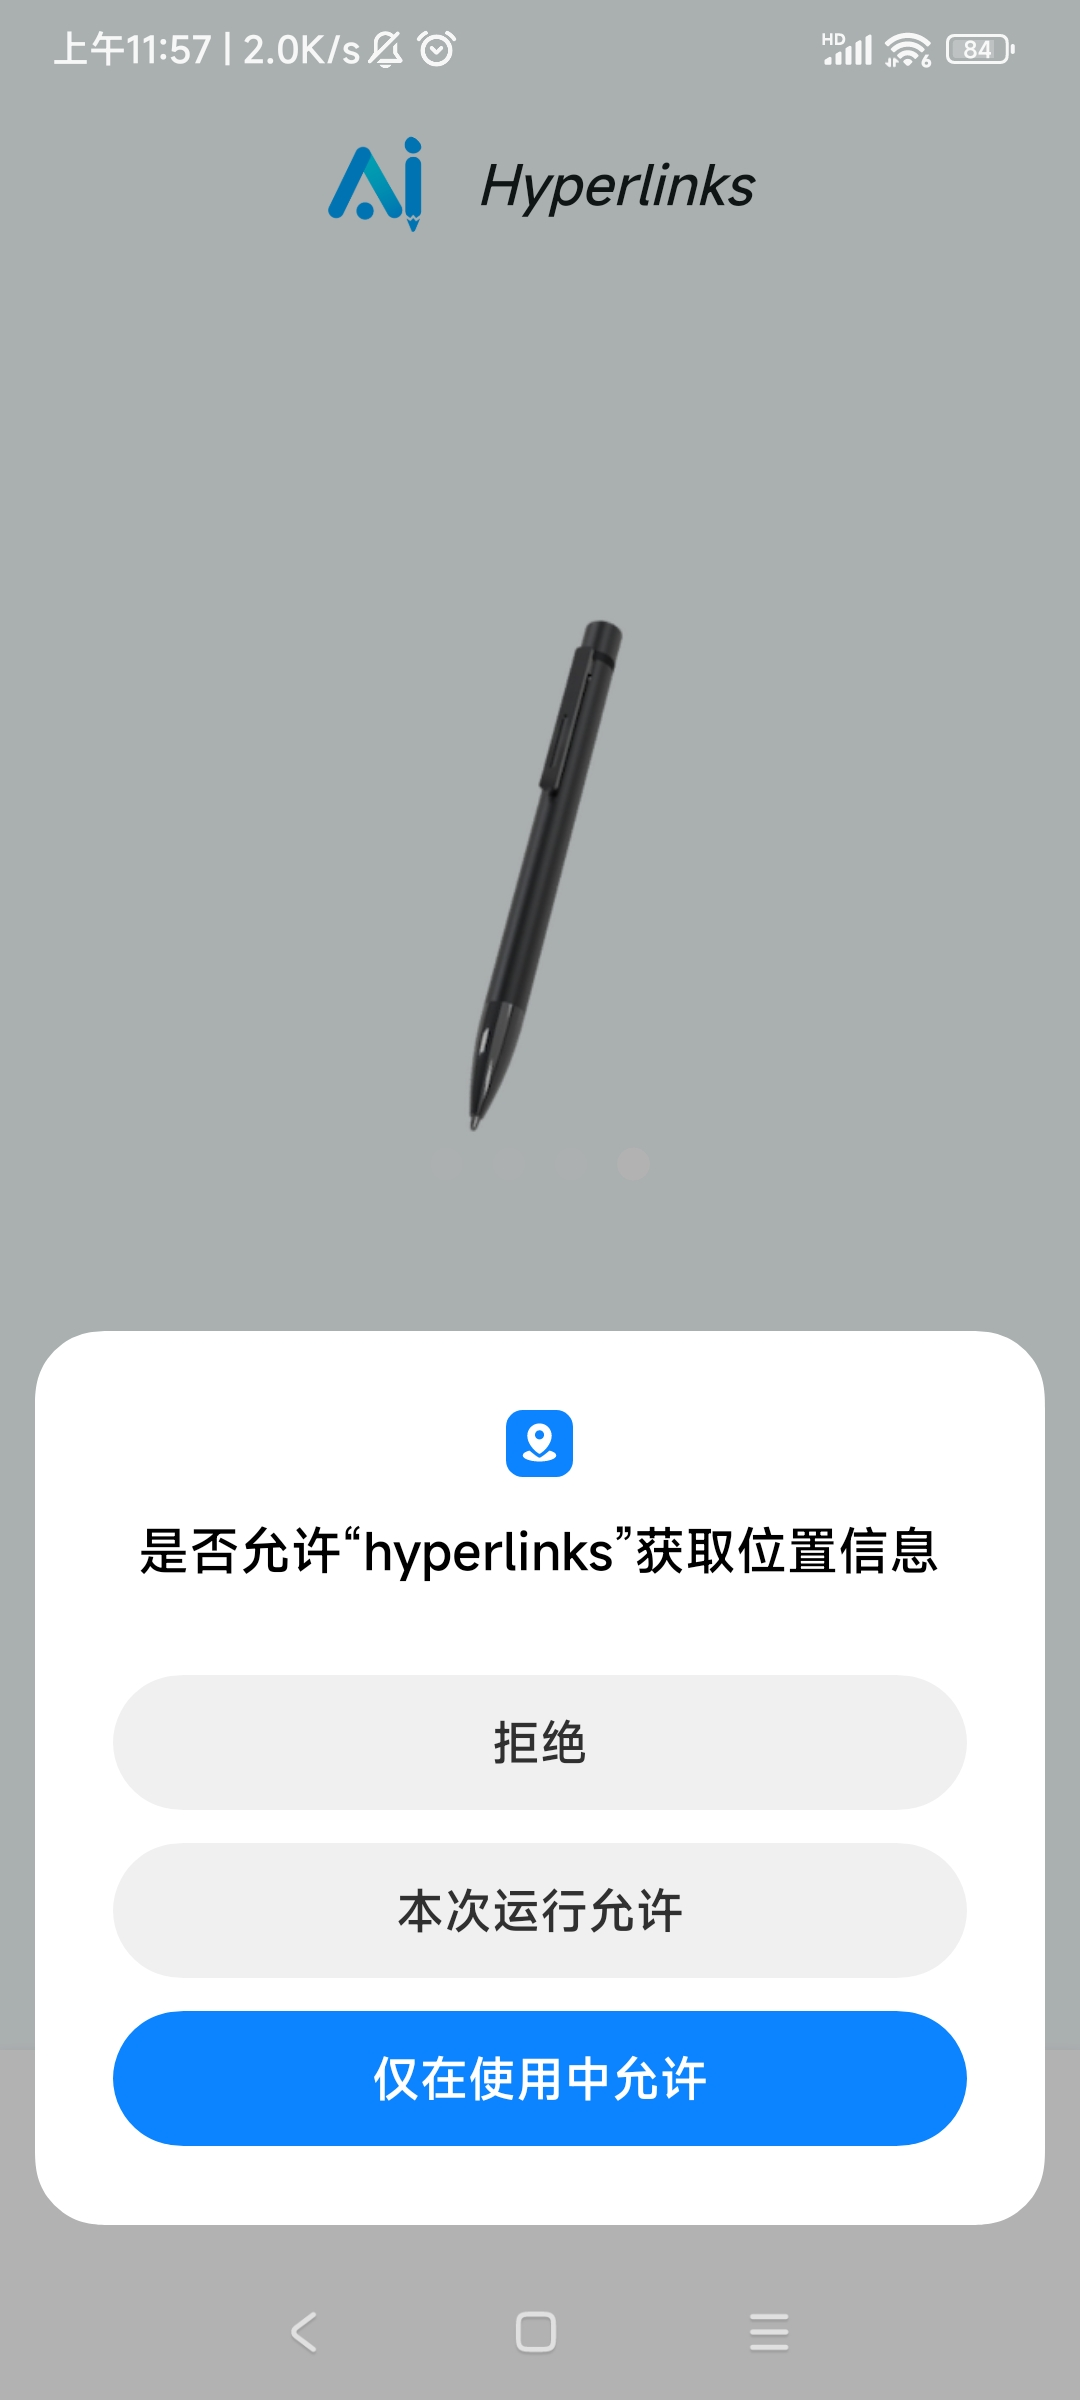
Authorize the APP to access your location information
Use the APP to pair and connect to the device:
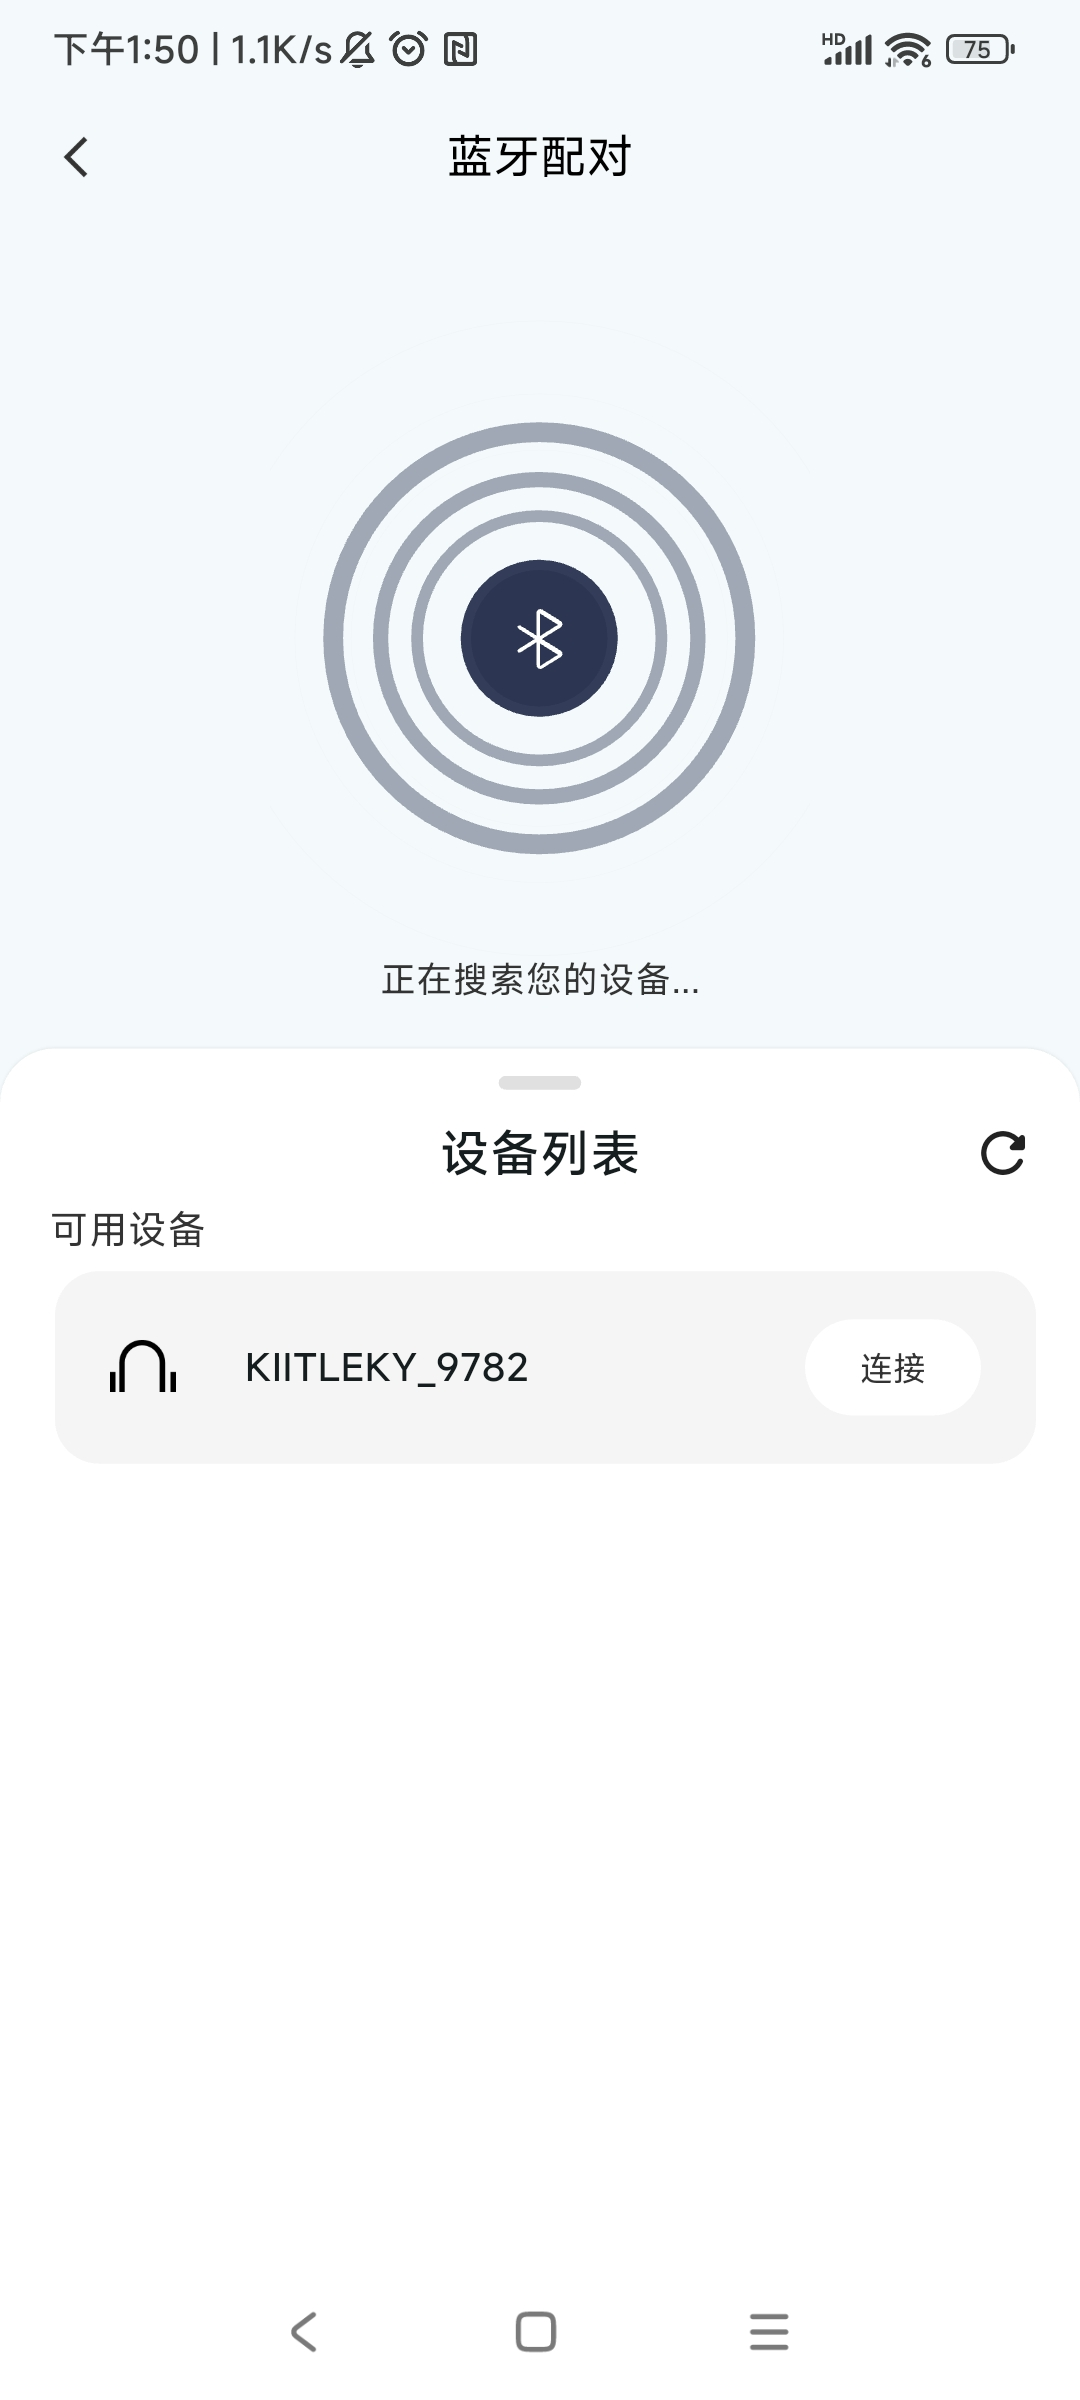
• Click the "Add New Device" button in the APP to enter the Bluetooth pairing list page

• Turn on the pen-shaped recording device
• In the APP device list, the Bluetooth name of the pen-shaped recording device starts with "KIITLEKY_"
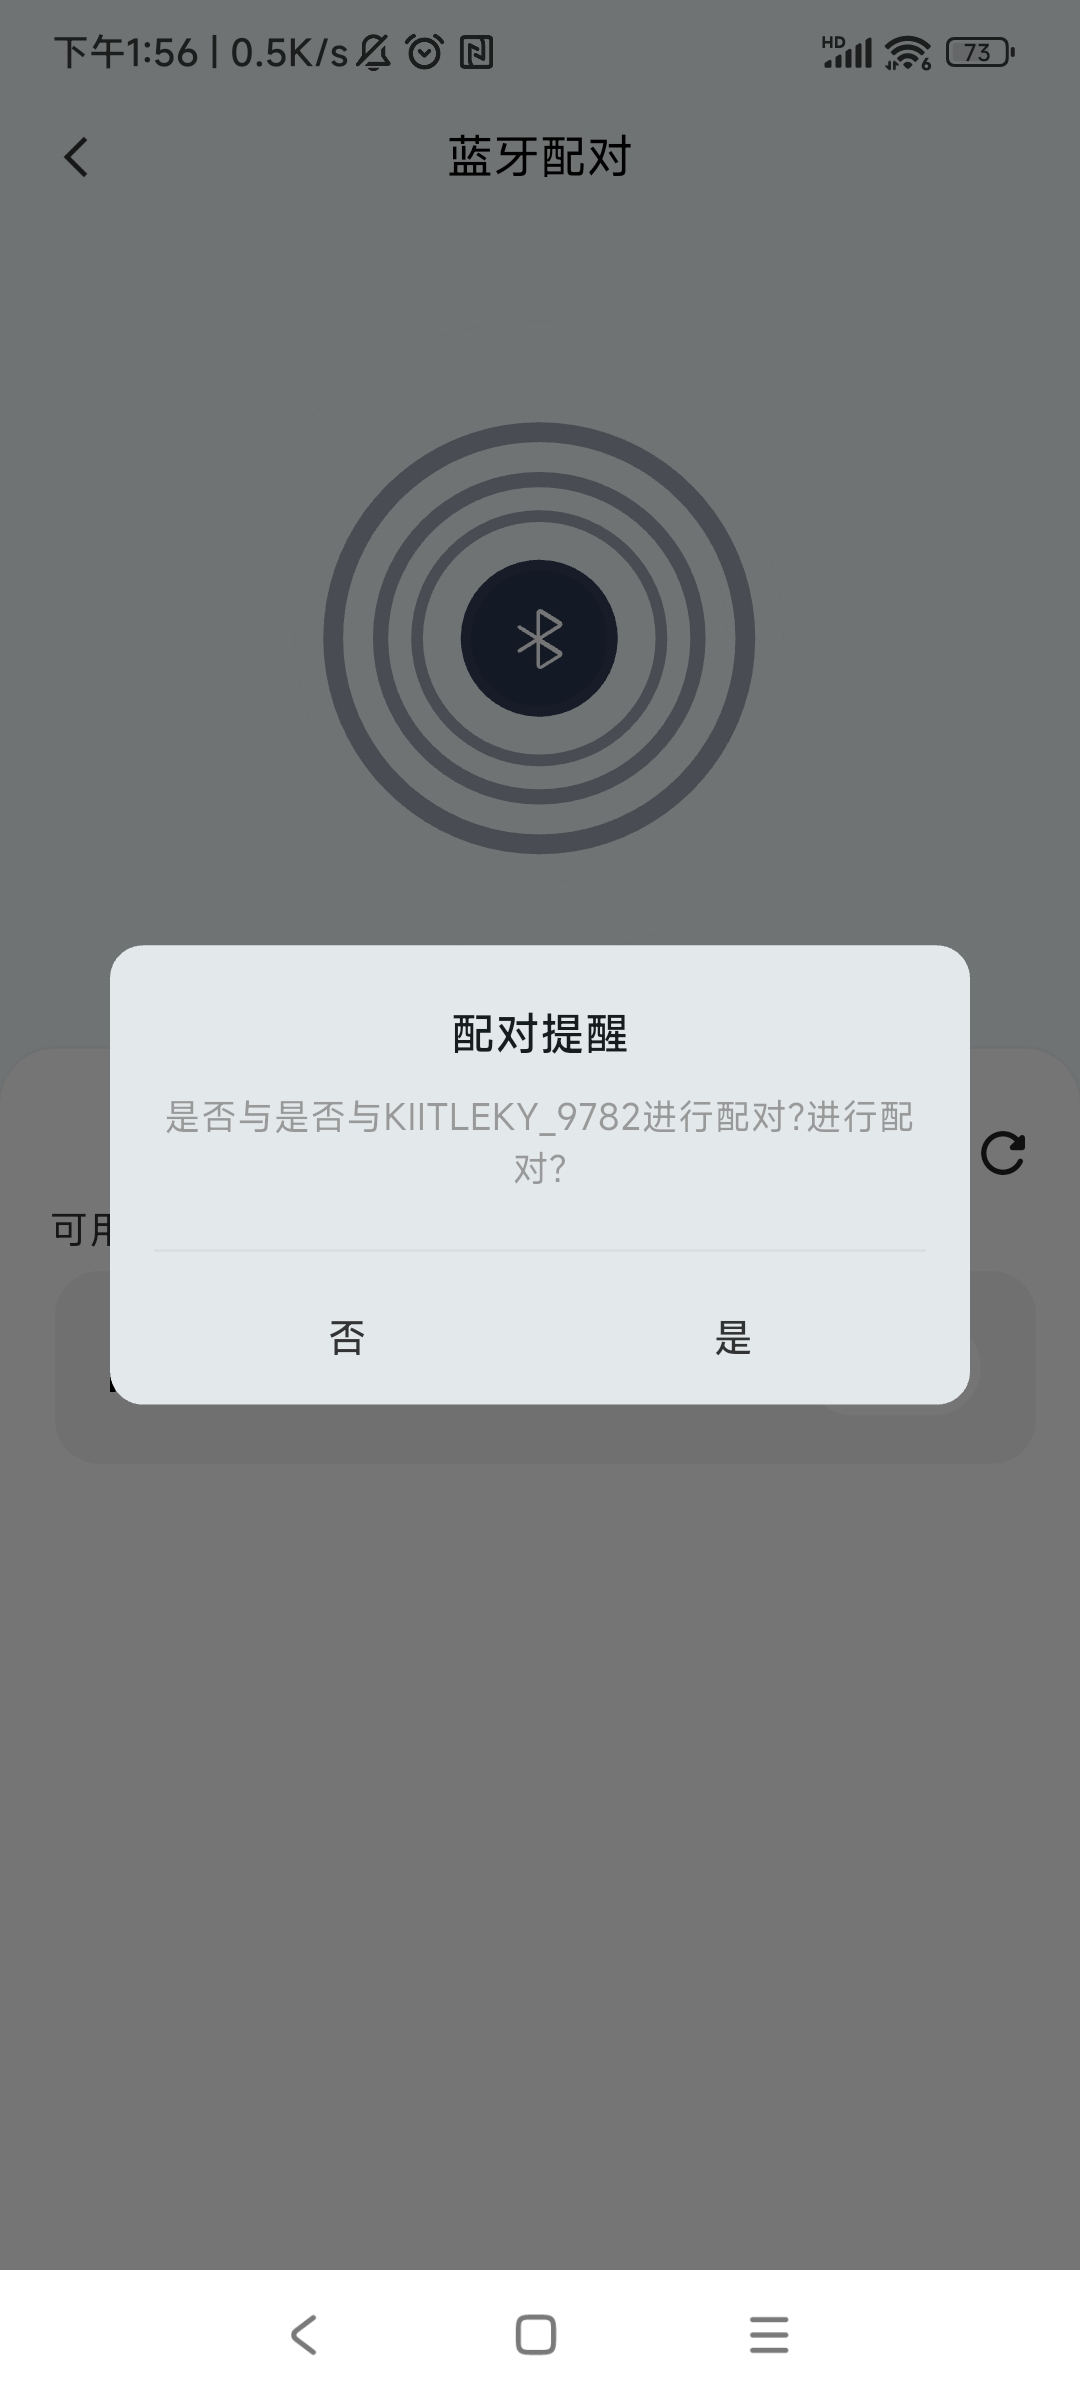
• Click the "Pair" button next to the device with the Bluetooth name starting with "KIITLEKY_"
• Click the "Yes" button in the pairing reminder pop-up window

After successful pairing, enter the APP home page
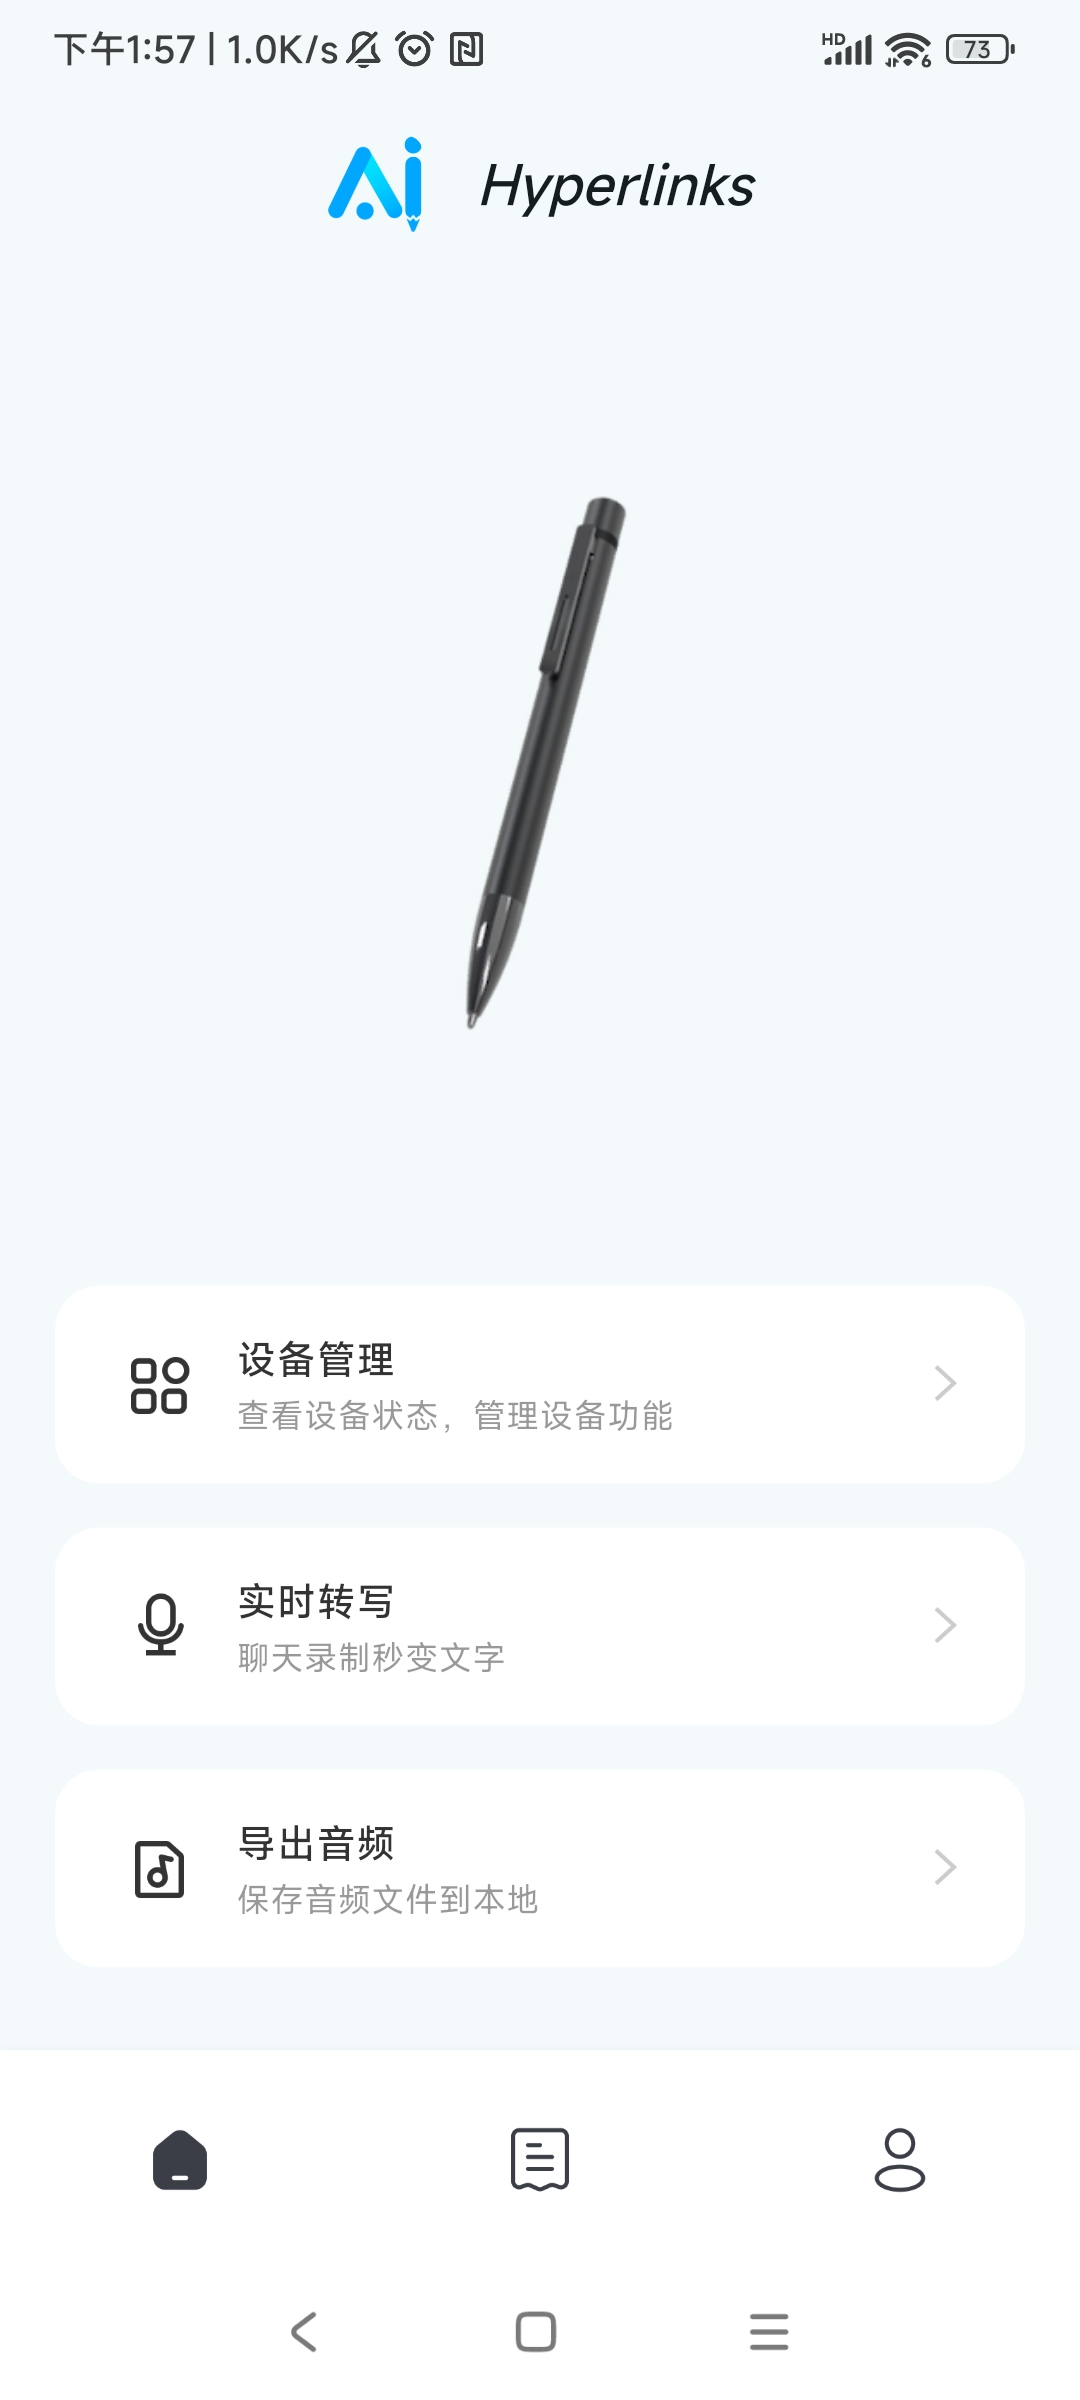
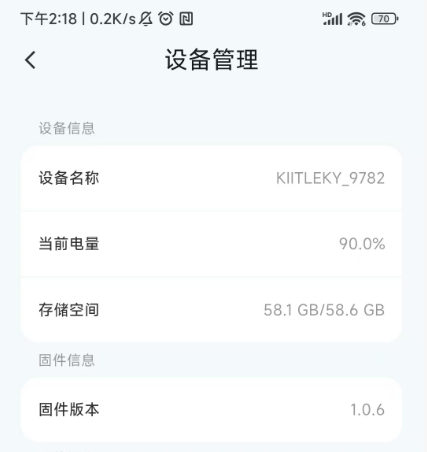
Check the device status:
• Click the "Device Management" button to enter the device management page
• On the device management page, you can view the device's "Current Battery Level", "Storage Space", and "Firmware Version"
Real-time transcription:
• Click "Real-time Transcription" to pop up the language selection window
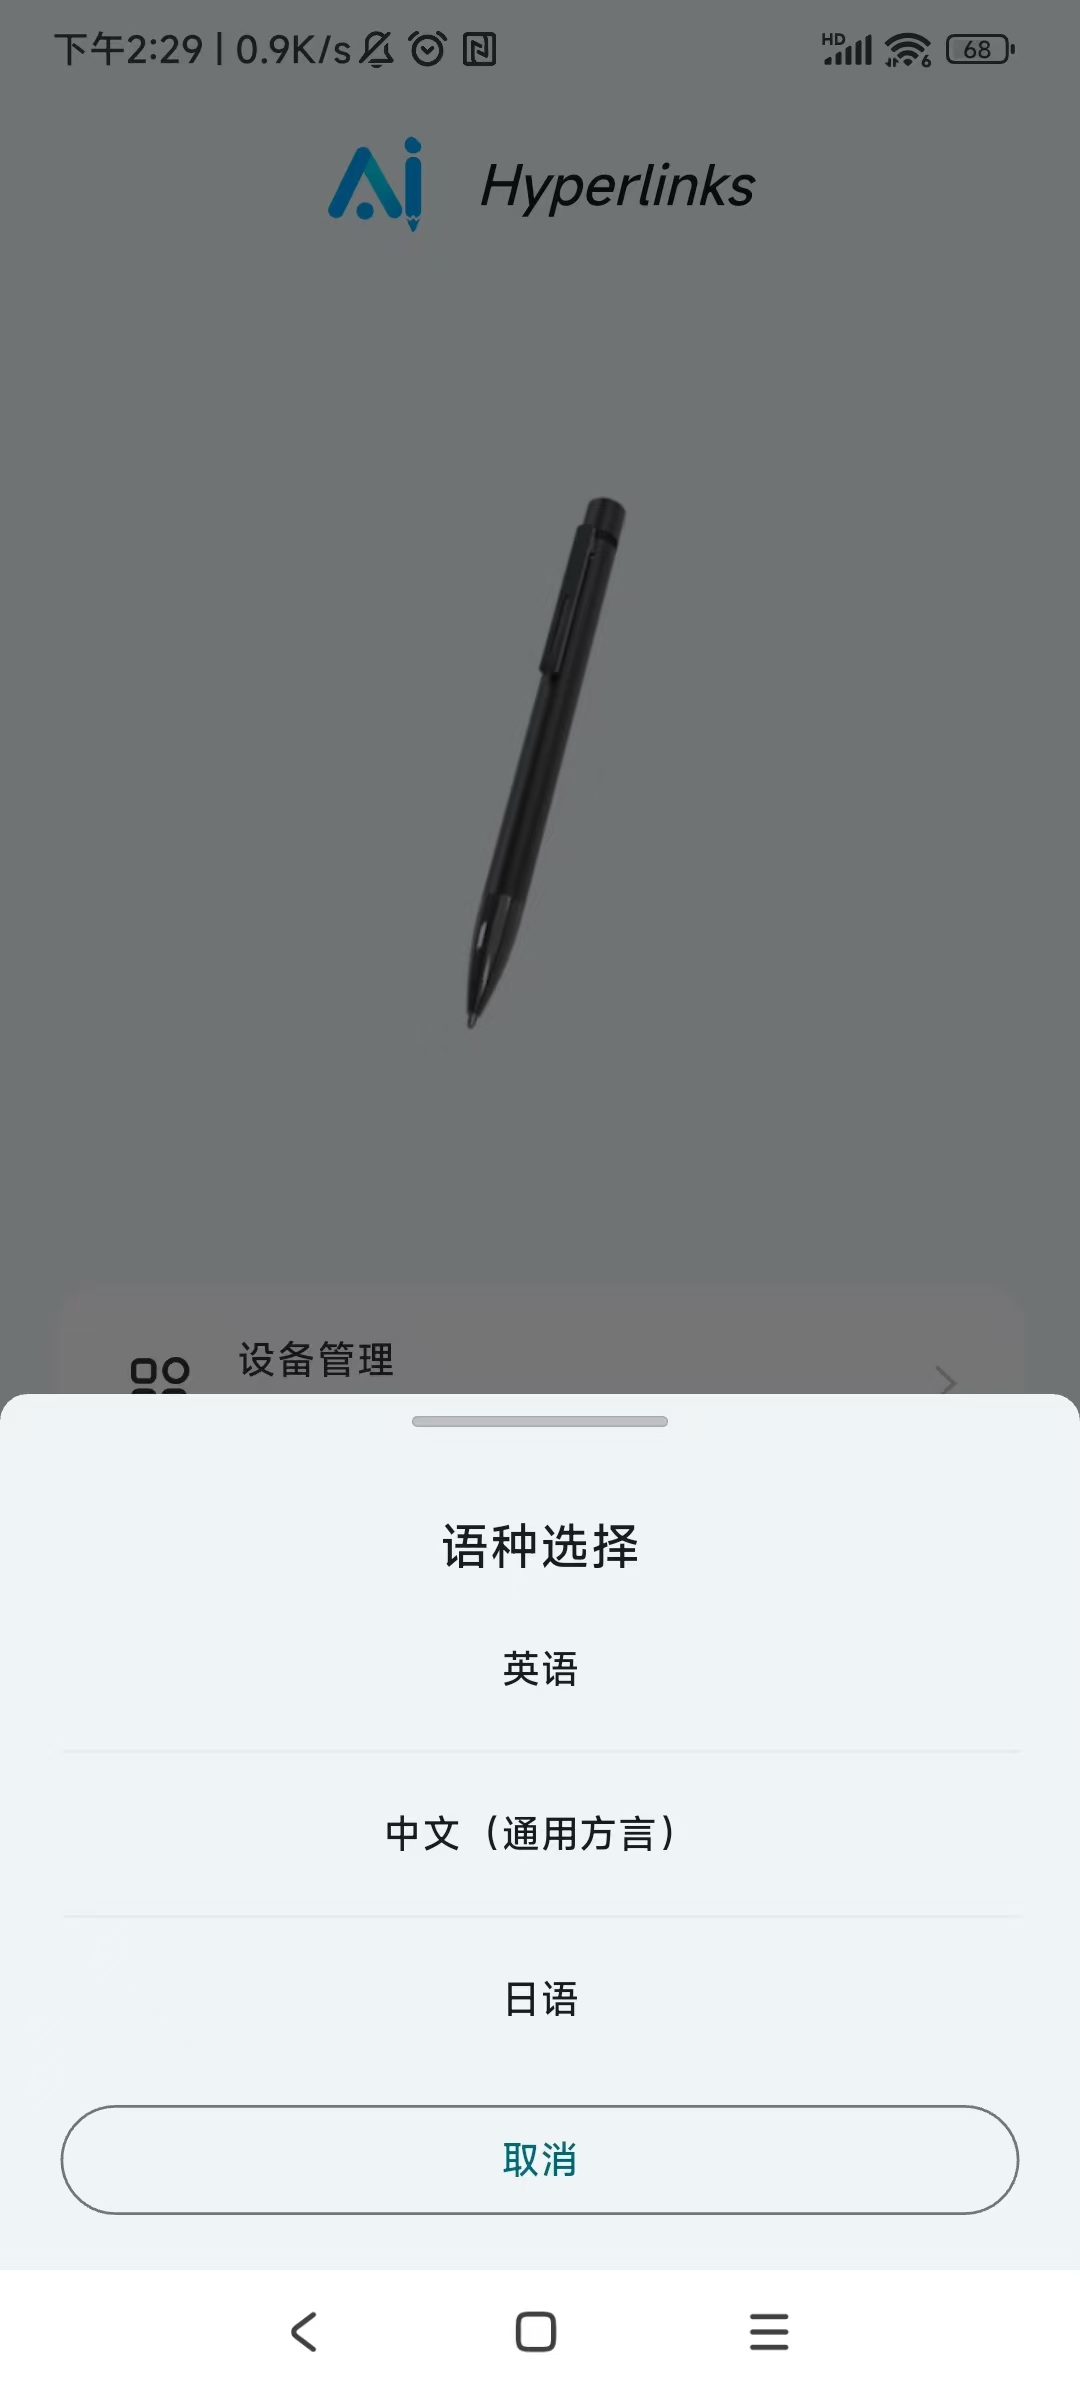
After selecting the language, enter the real-time transcription page
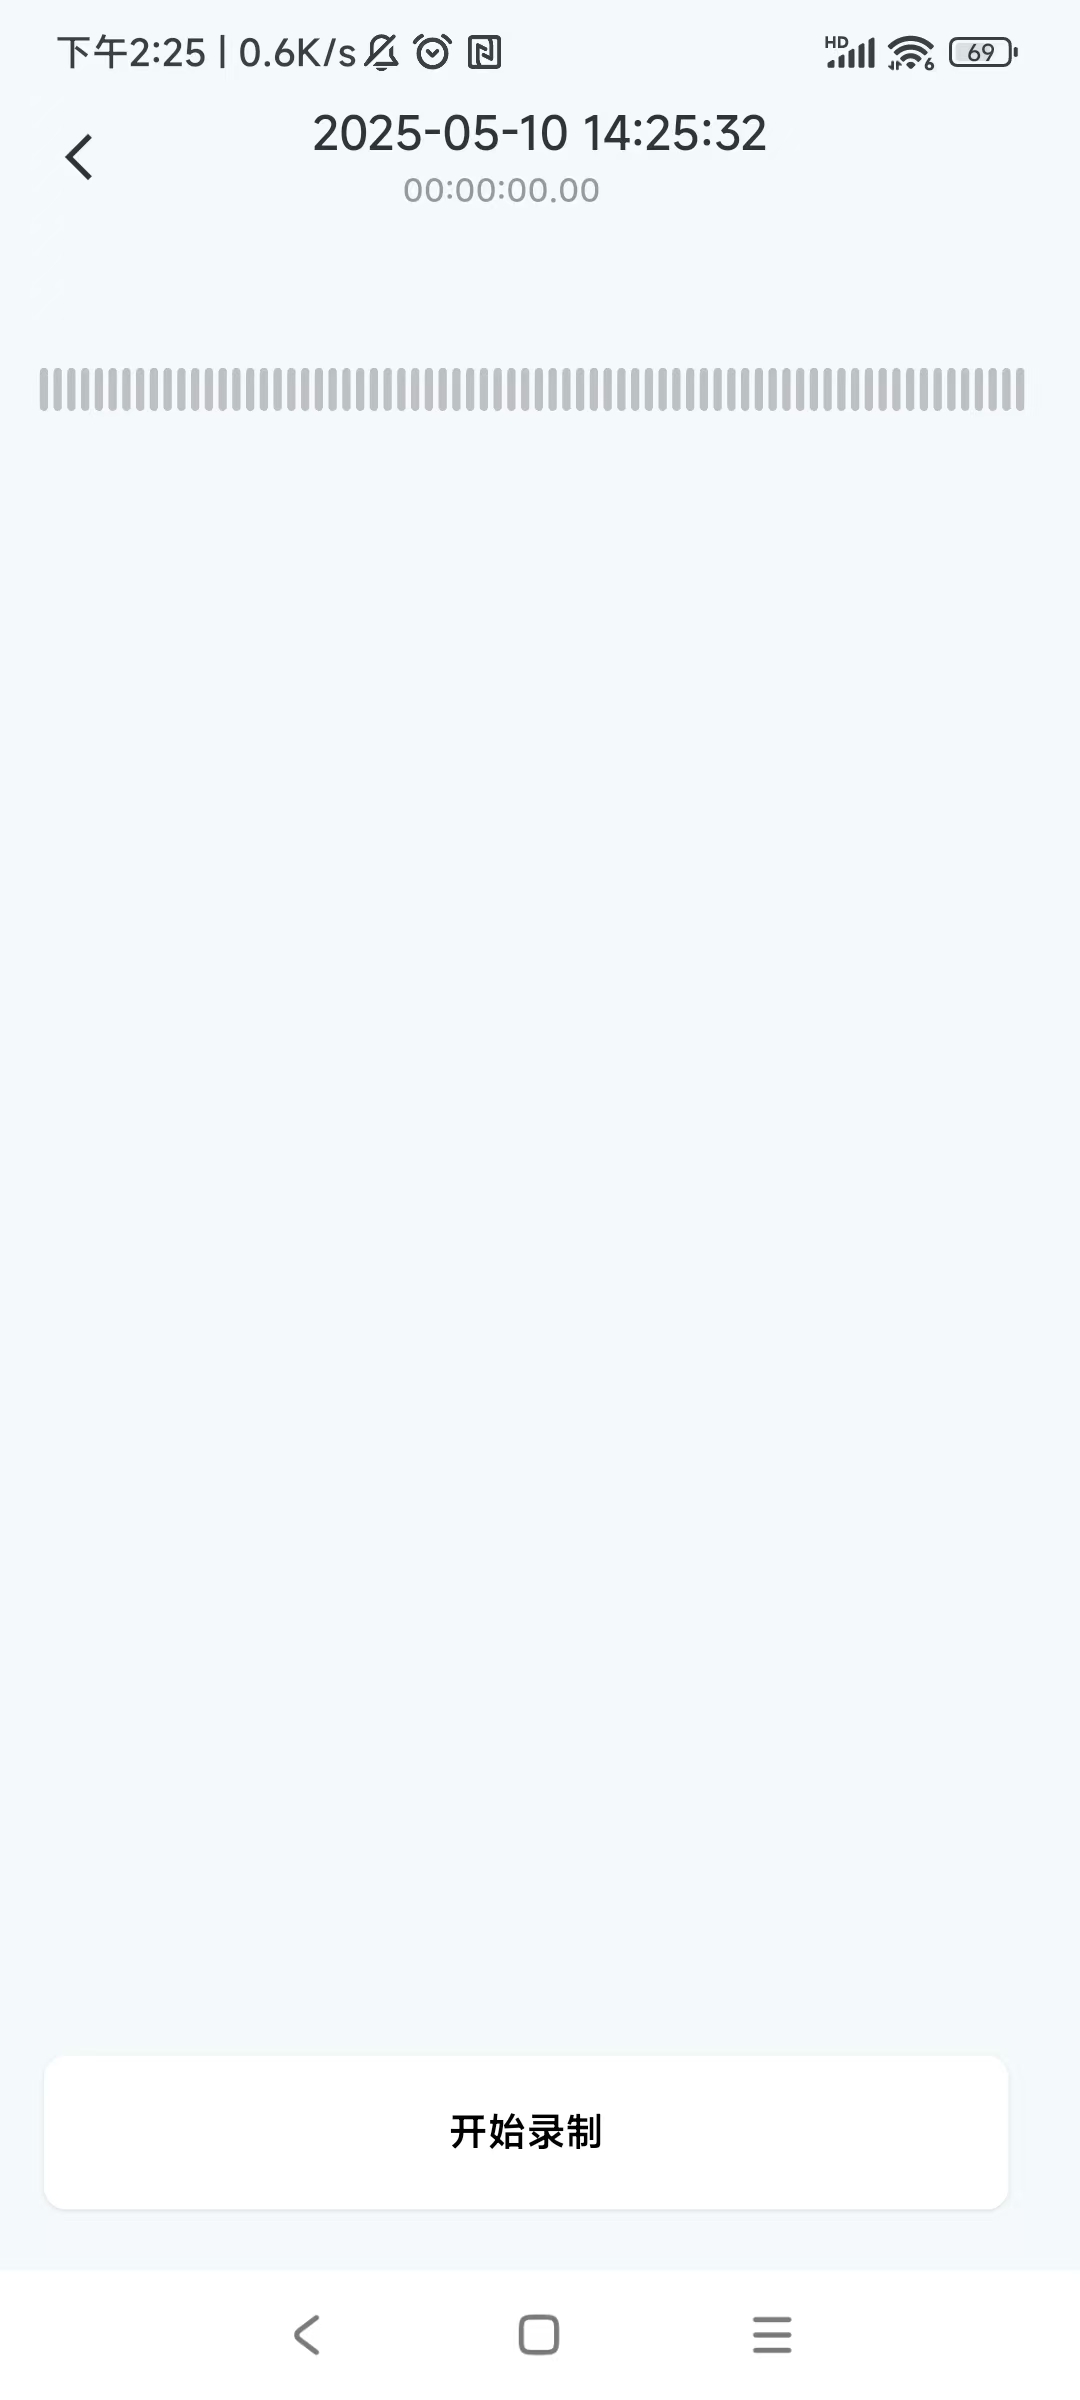
• Click the "Start Recording" button to start real-time transcription, and the pen-shaped recording device enters the recording state
• After the meeting ends, click the "End Recording" button to stop real-time transcription, and the device stops recording
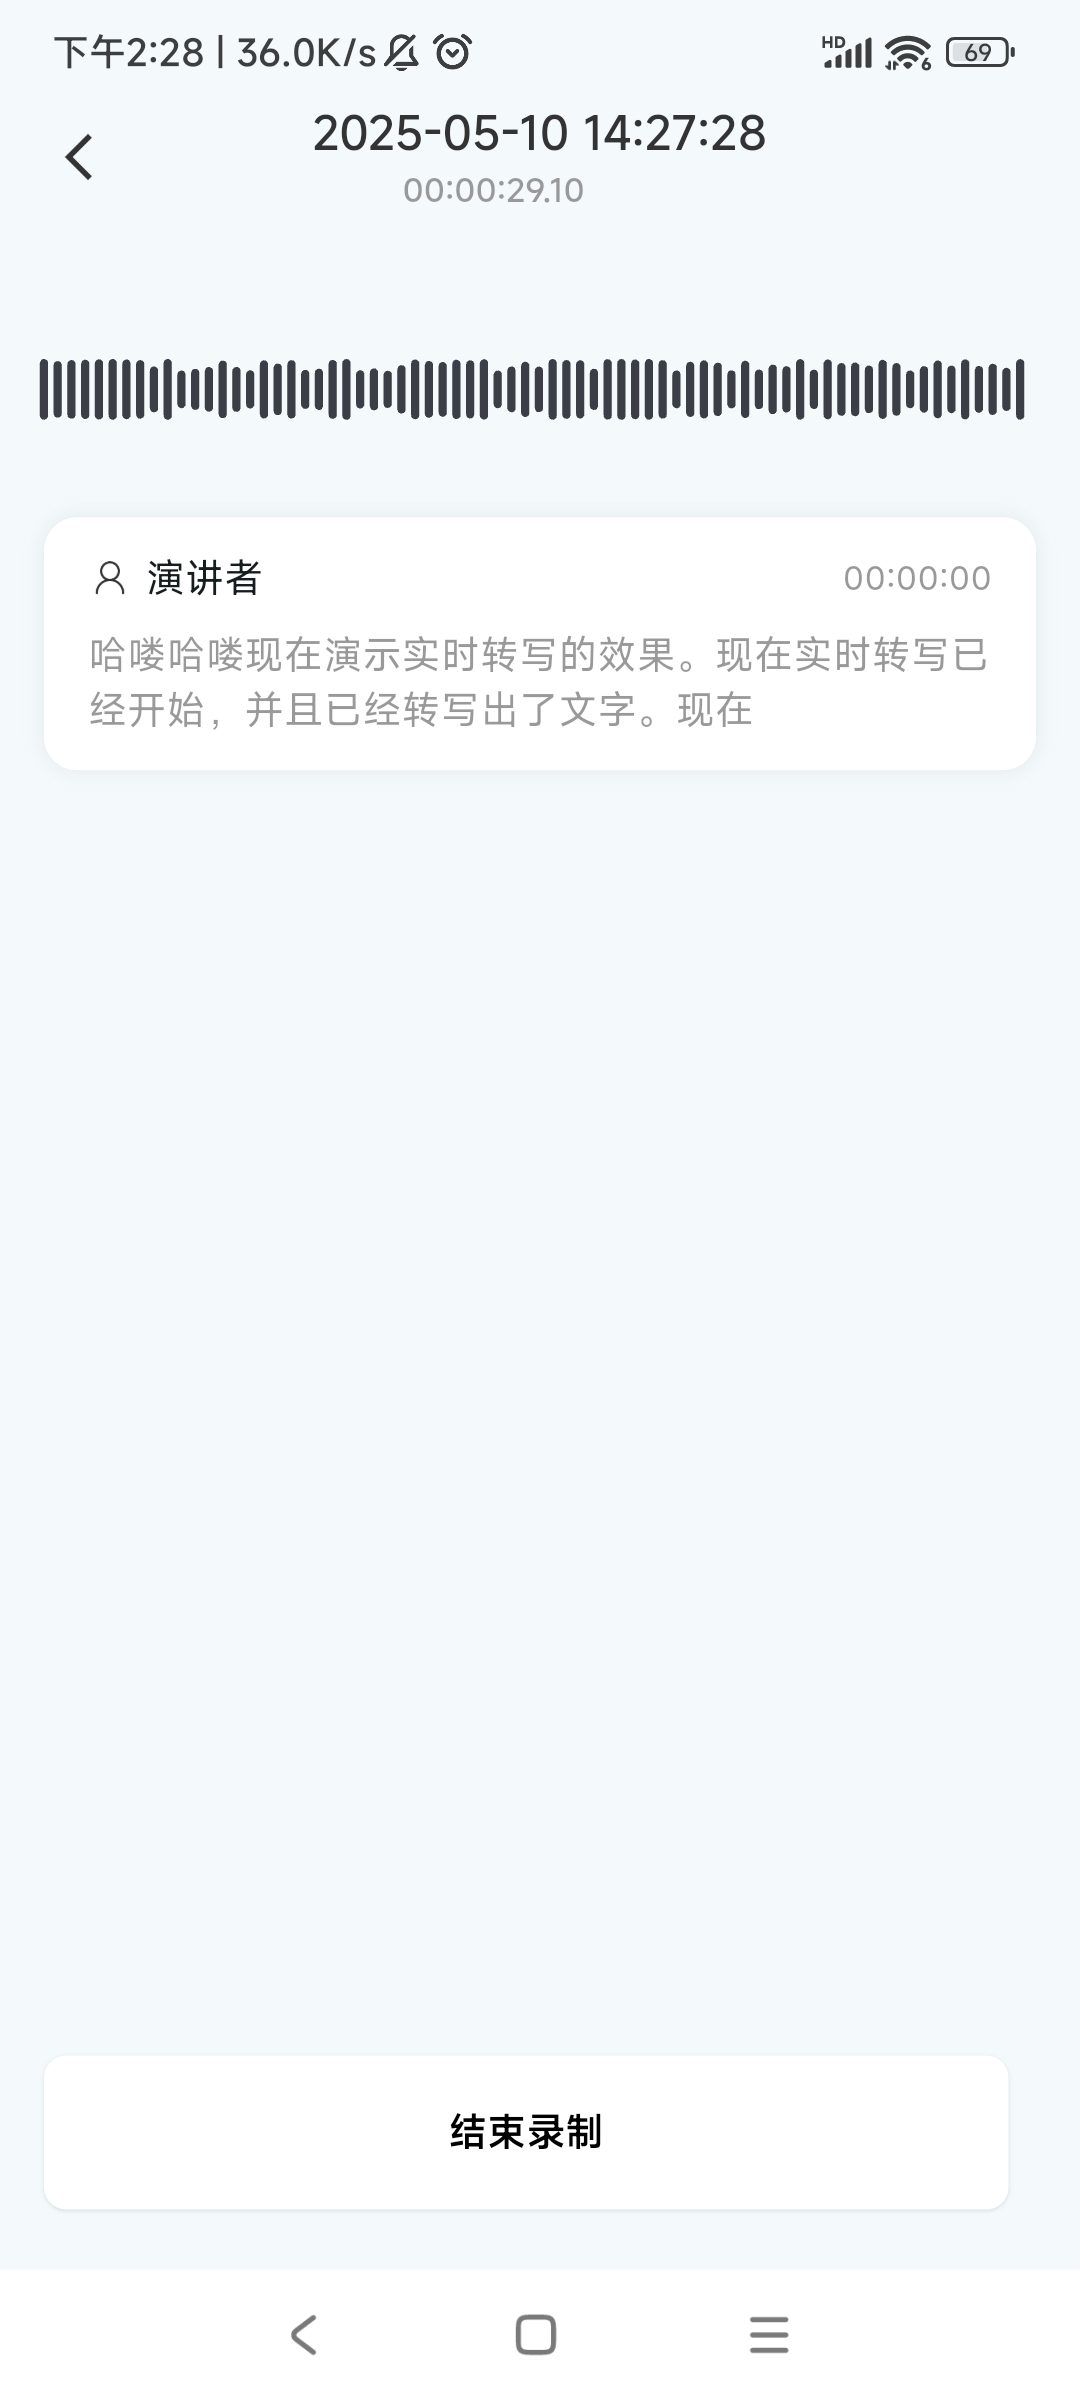
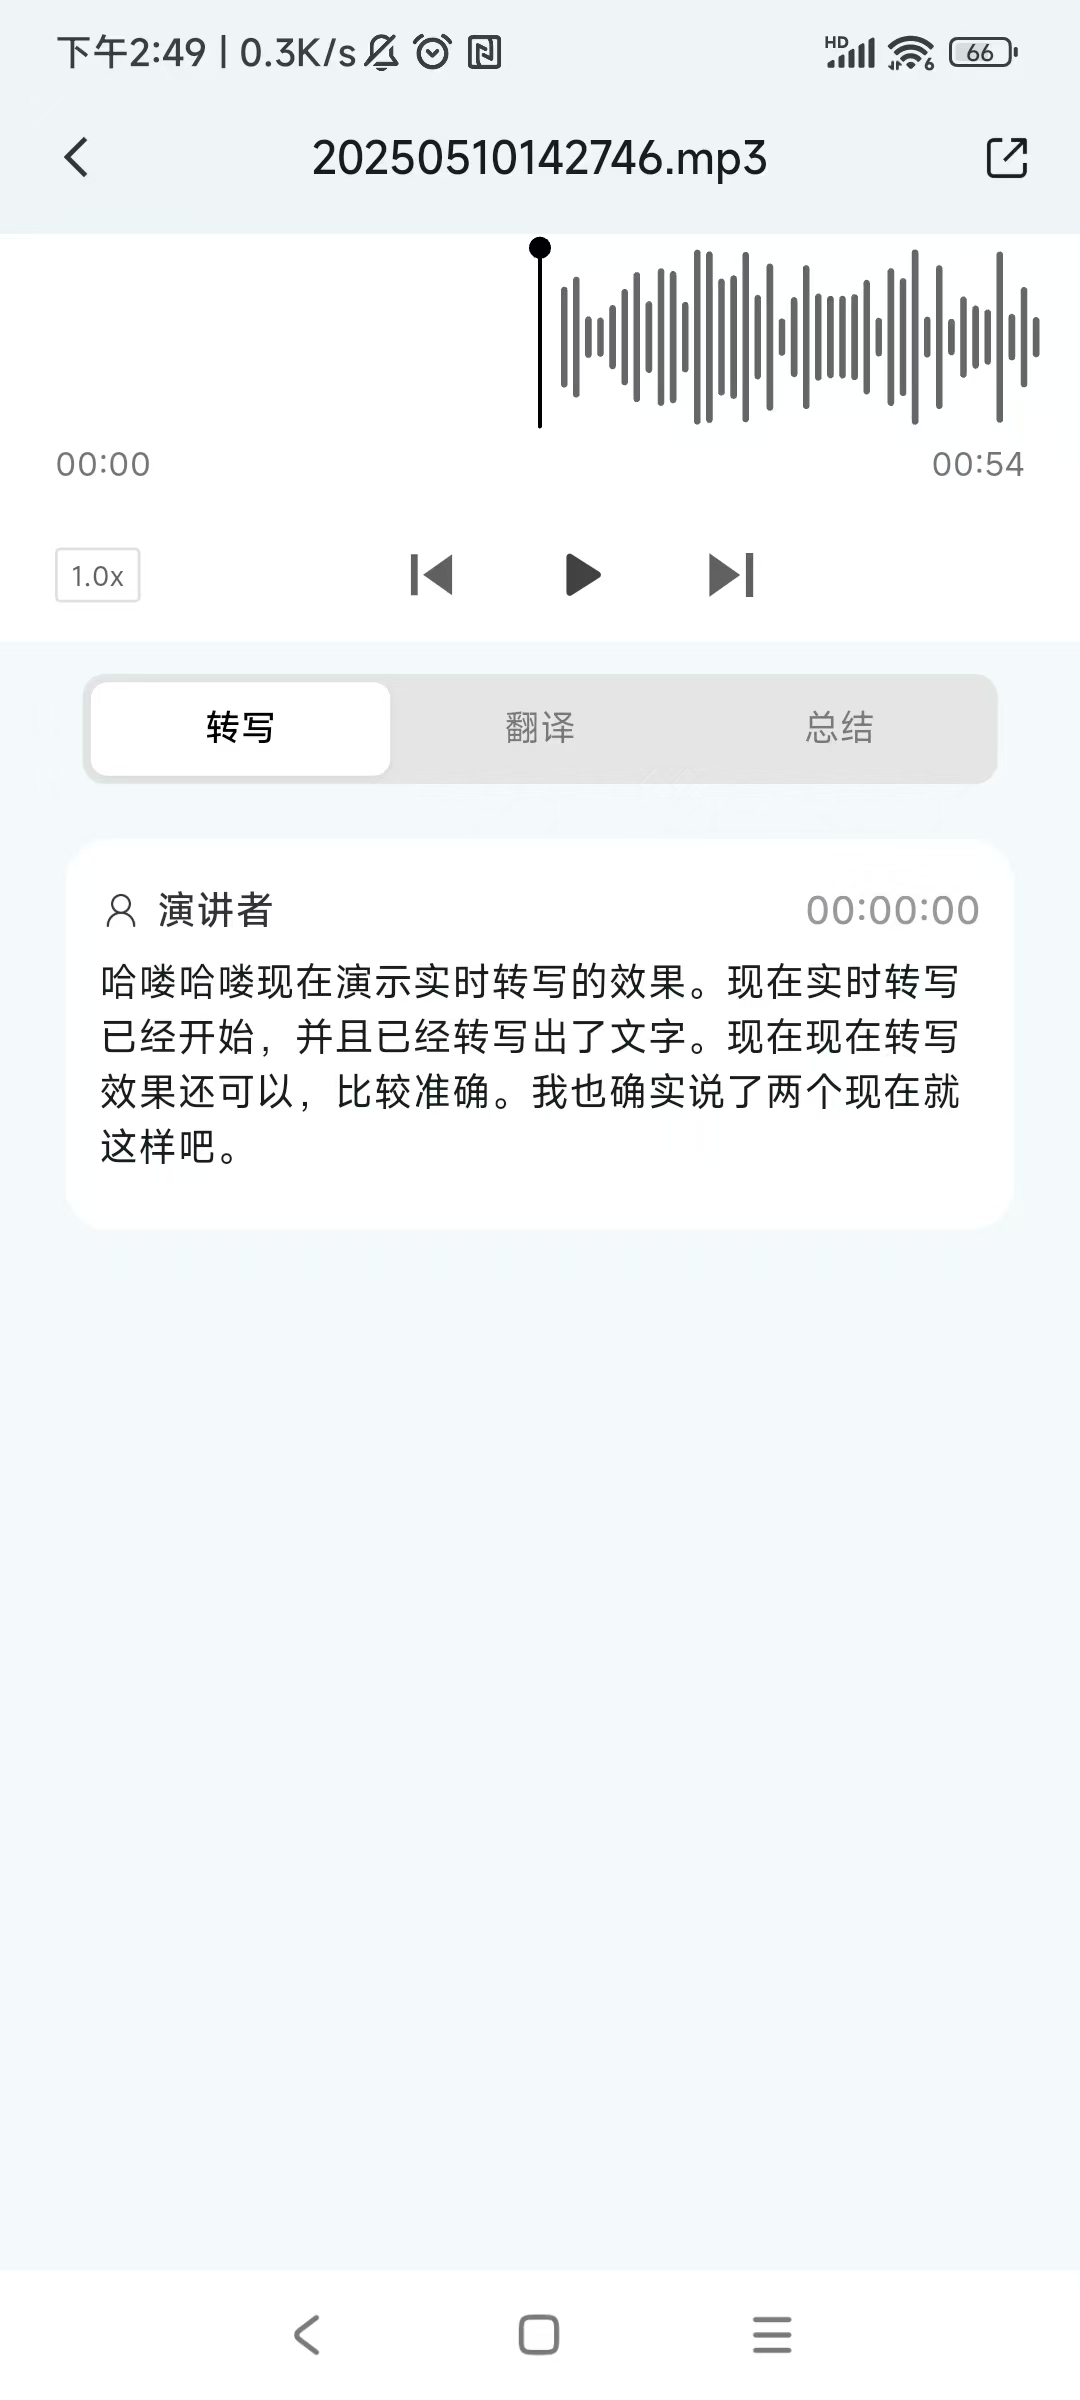
• After real-time transcription ends, enter the project details page
• On the project details page, click the play button to play the audio, fast-forward or rewind, and adjust the playback speed
• Click the share button in the upper right corner to share the audio file
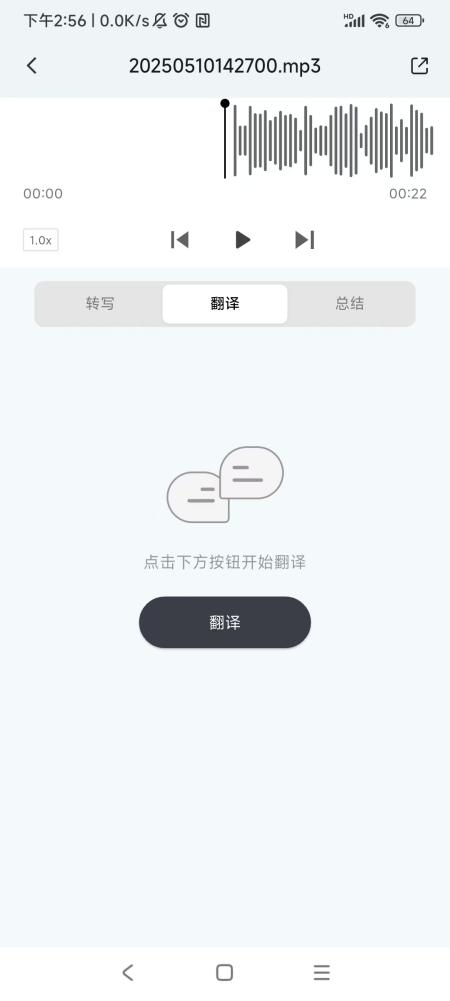
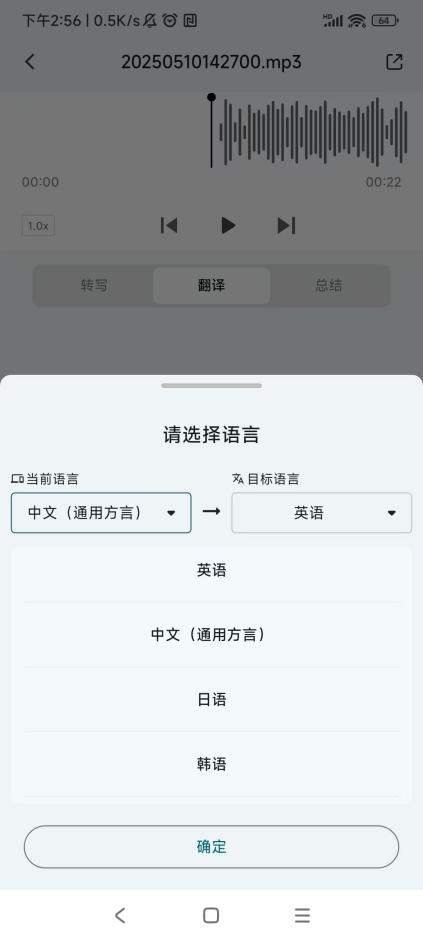
• Click the "Translate" button to enter the translation page. Click the "Translate" button again to pop up the language selection window.
• In the language selection window, select the language used during recording and the target language for translation, then click "OK".
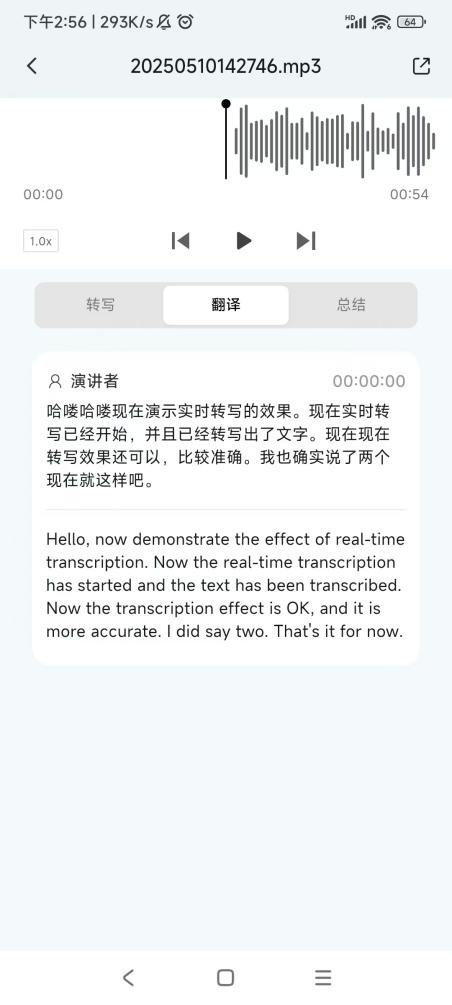
• After the translation is completed, the transcribed text and the translated text will be displayed on the translation page.
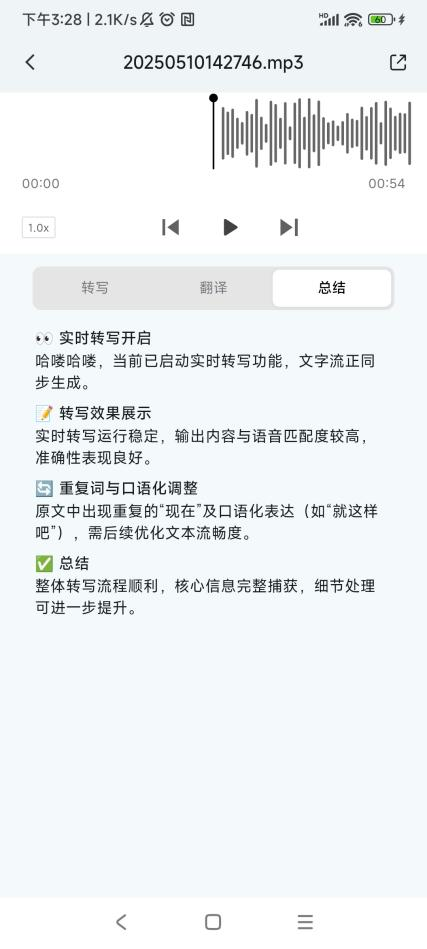
• Click the "Summary" button to enter the summary page. Click the "Summary" button again to pop up the summary type selection window.

• In the summary type selection window, you can scroll up and down to select the desired type. Click the selected type to start the summary processing.
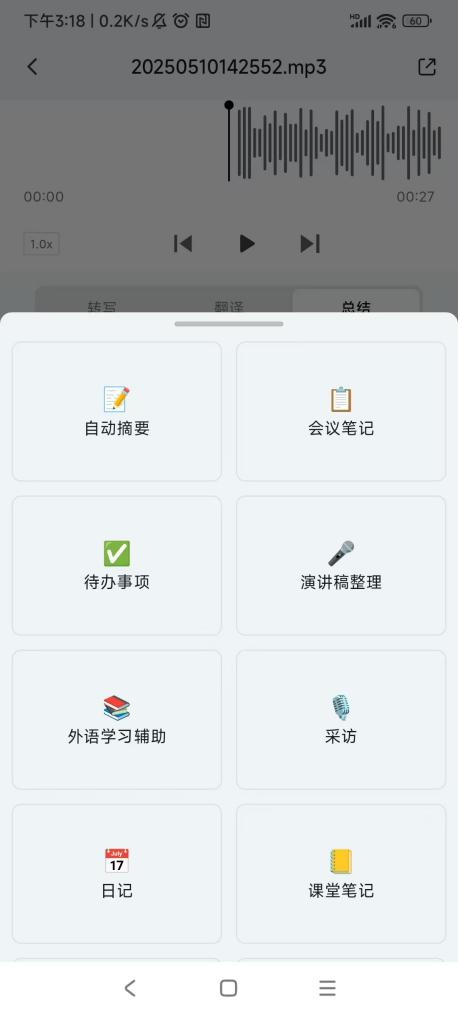
• After the summary is completed, the summary text will be displayed on the summary page.
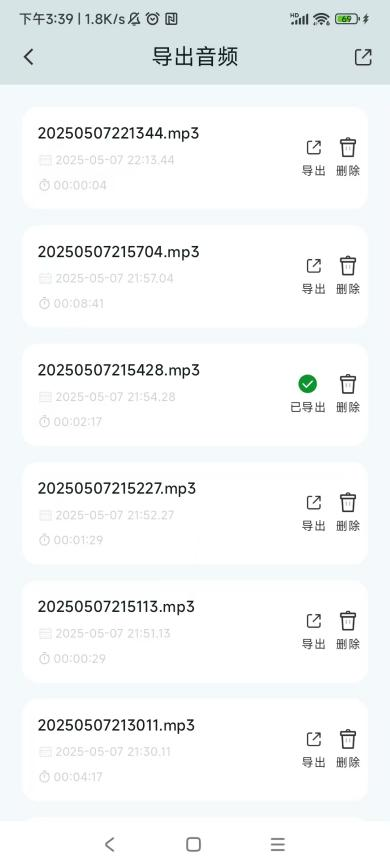
Export audio files:
• Click the "Export Audio" button to enter the audio file export list page.
• Click the "Export" button on the right side of the audio file you want to export.
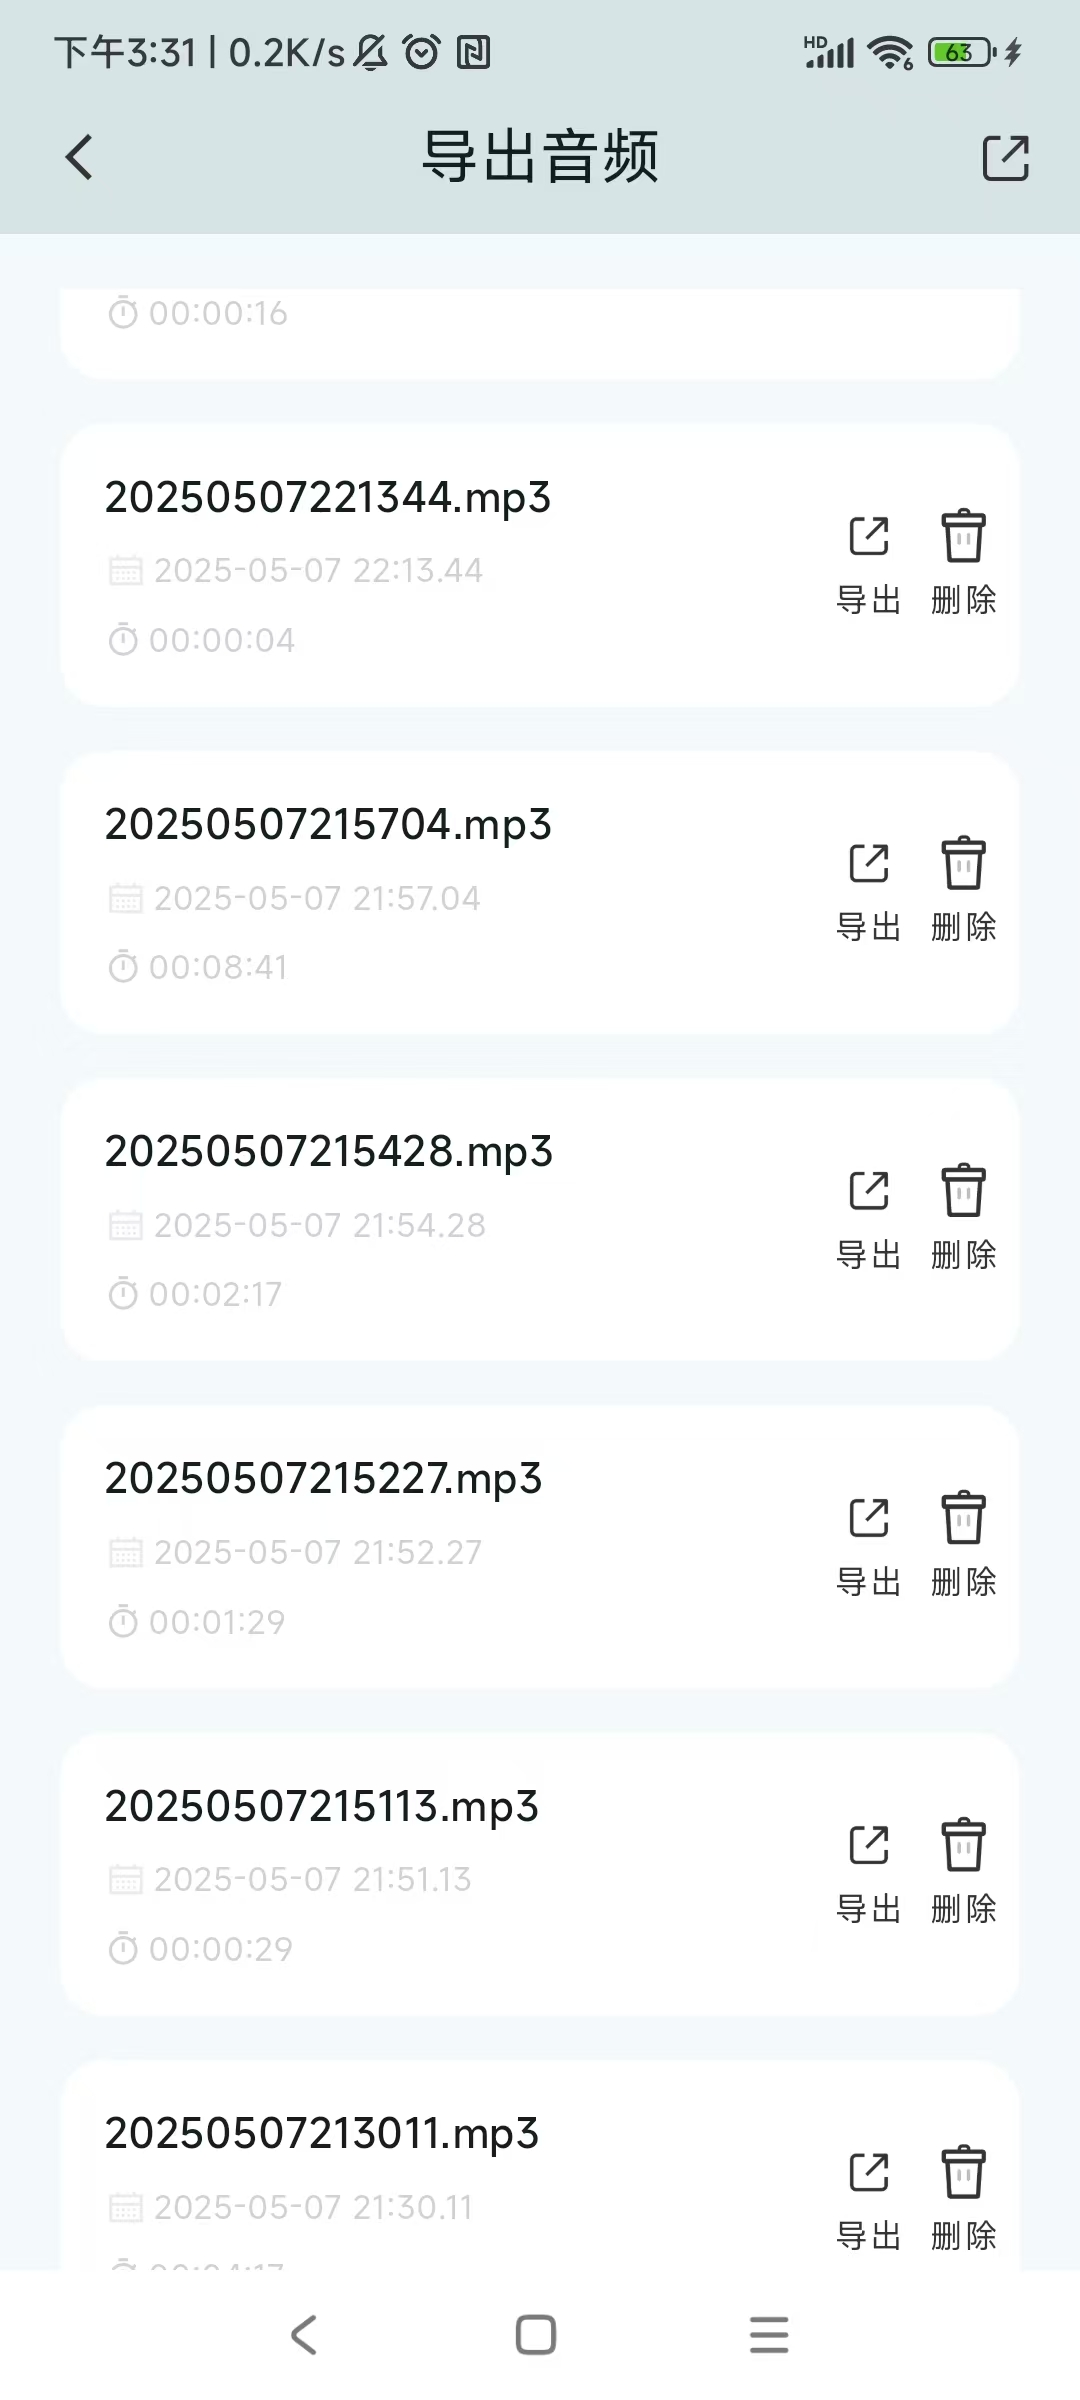
• The export progress of the file will be displayed. After the export is completed, "Exported" will be shown.
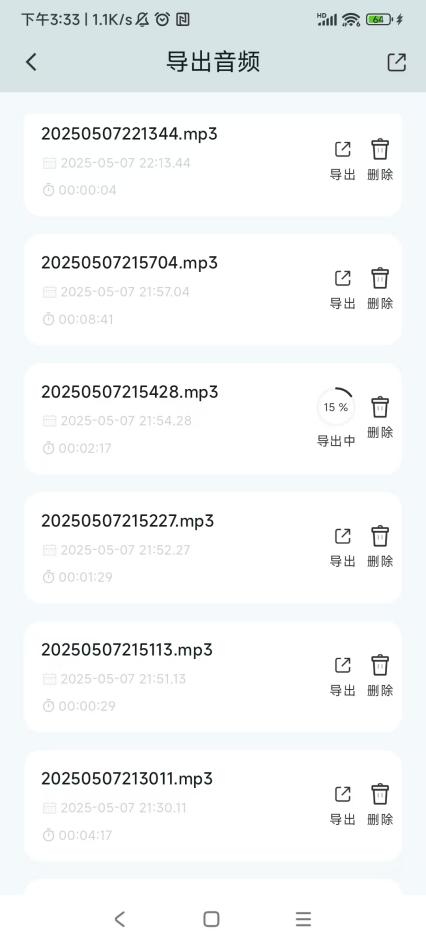
• Click the exported audio file to enter the project details page. Un - exported audio files cannot be accessed for project details.
• Click the "Delete" button to delete the audio file from both the APP and the device.
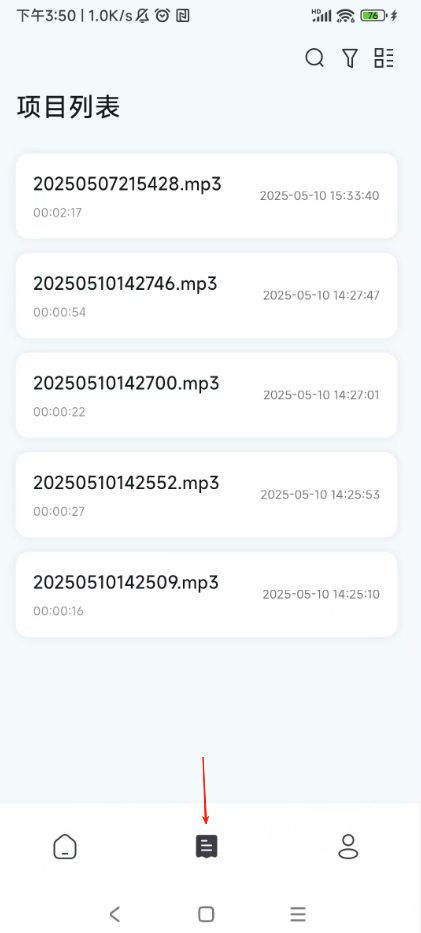
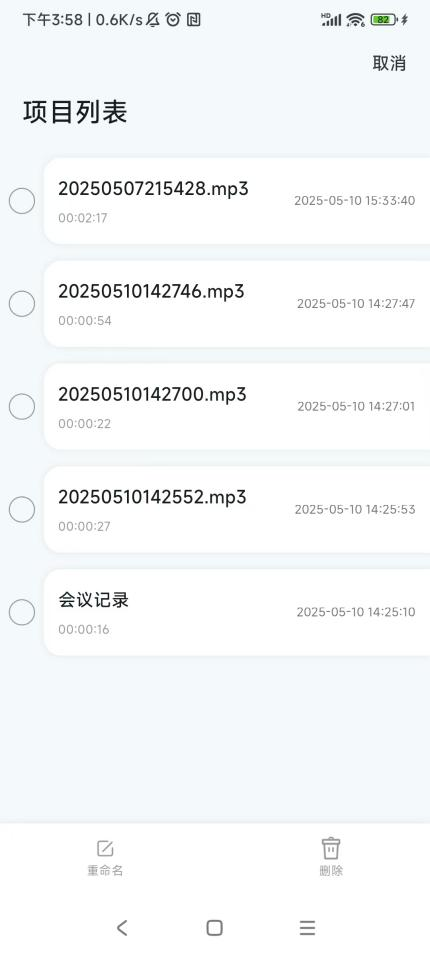
Project List:
• Click the project list icon on the home page to enter the project list page.
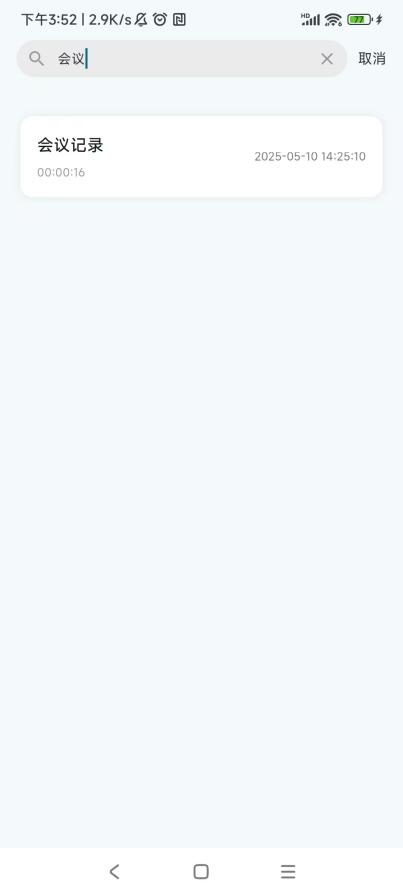
• Click the search button in the upper - right corner of the project list page to enter the search page. You can enter the name of the project you want to search for file search.
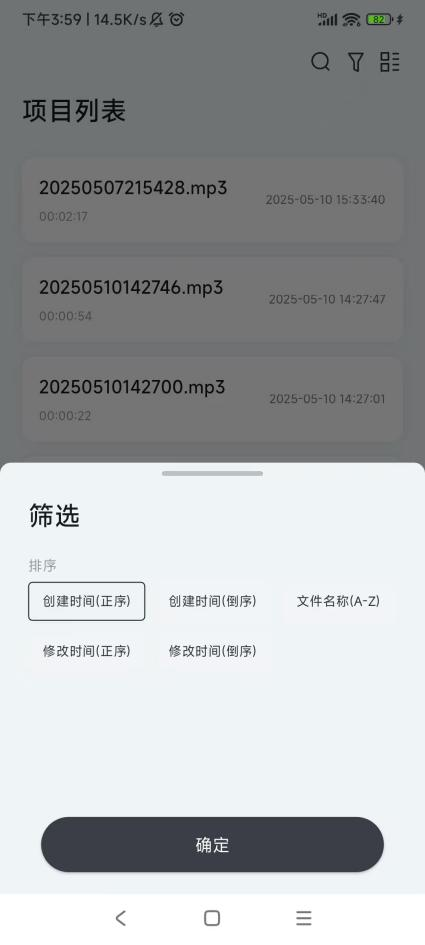
• Click the filter icon on the project list page. In the pop - up window, select the sorting type to sort the files in the project list.
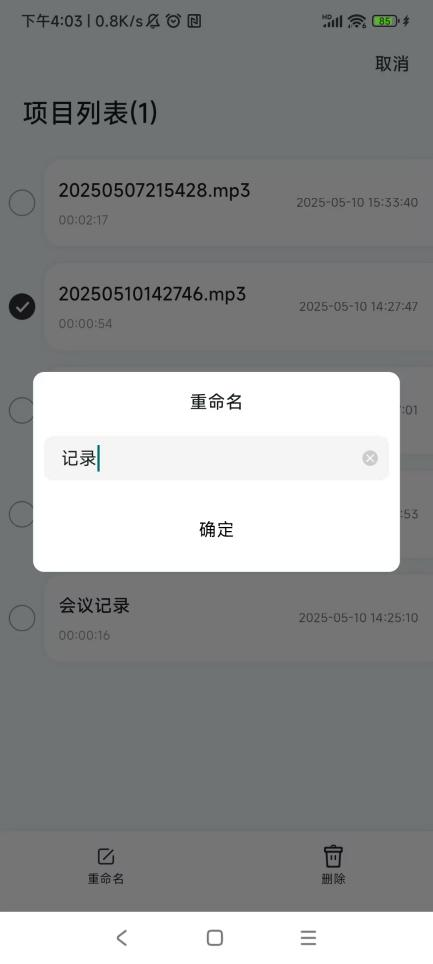
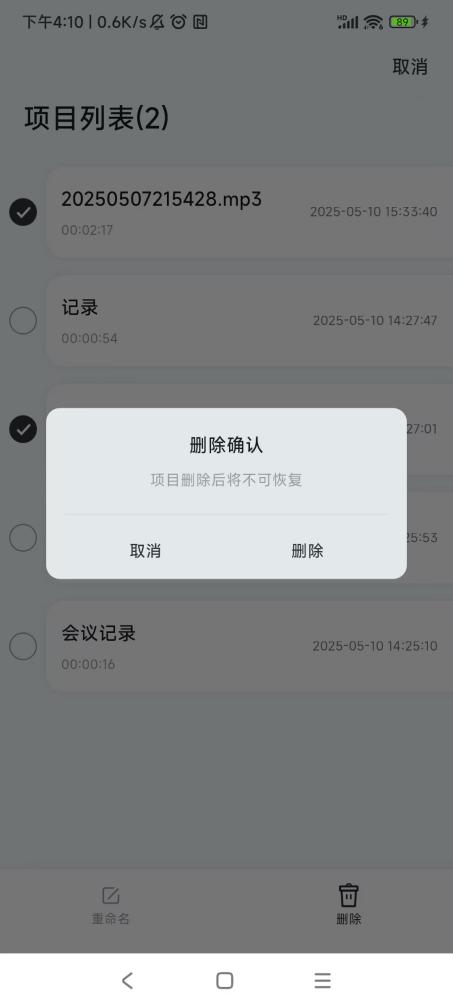
• Click the multi - select button on the project list page to enter the multi - select page.
• On the project list - multi - select page, you can rename a single - selected audio file.
• On the project list - multi - select page, you can perform batch deletion of multiple - selected audio files.
Personal Center:
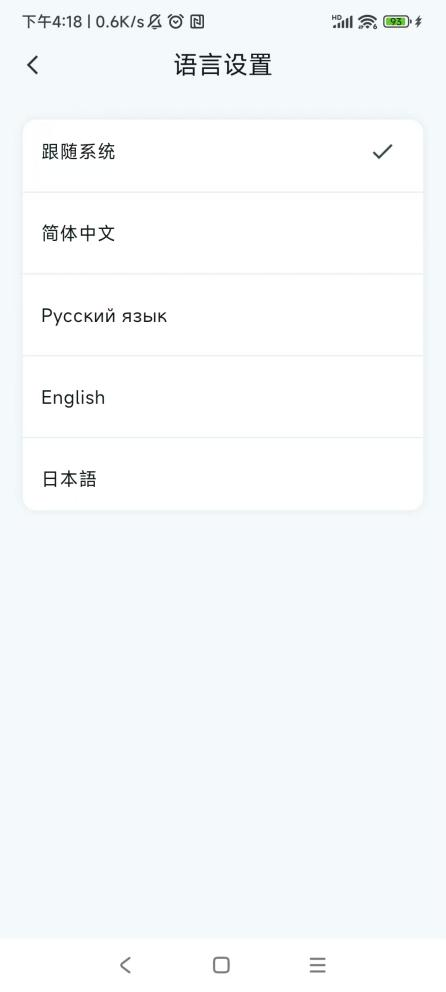
• Language Settings: You can switch the language type displayed in the APP.
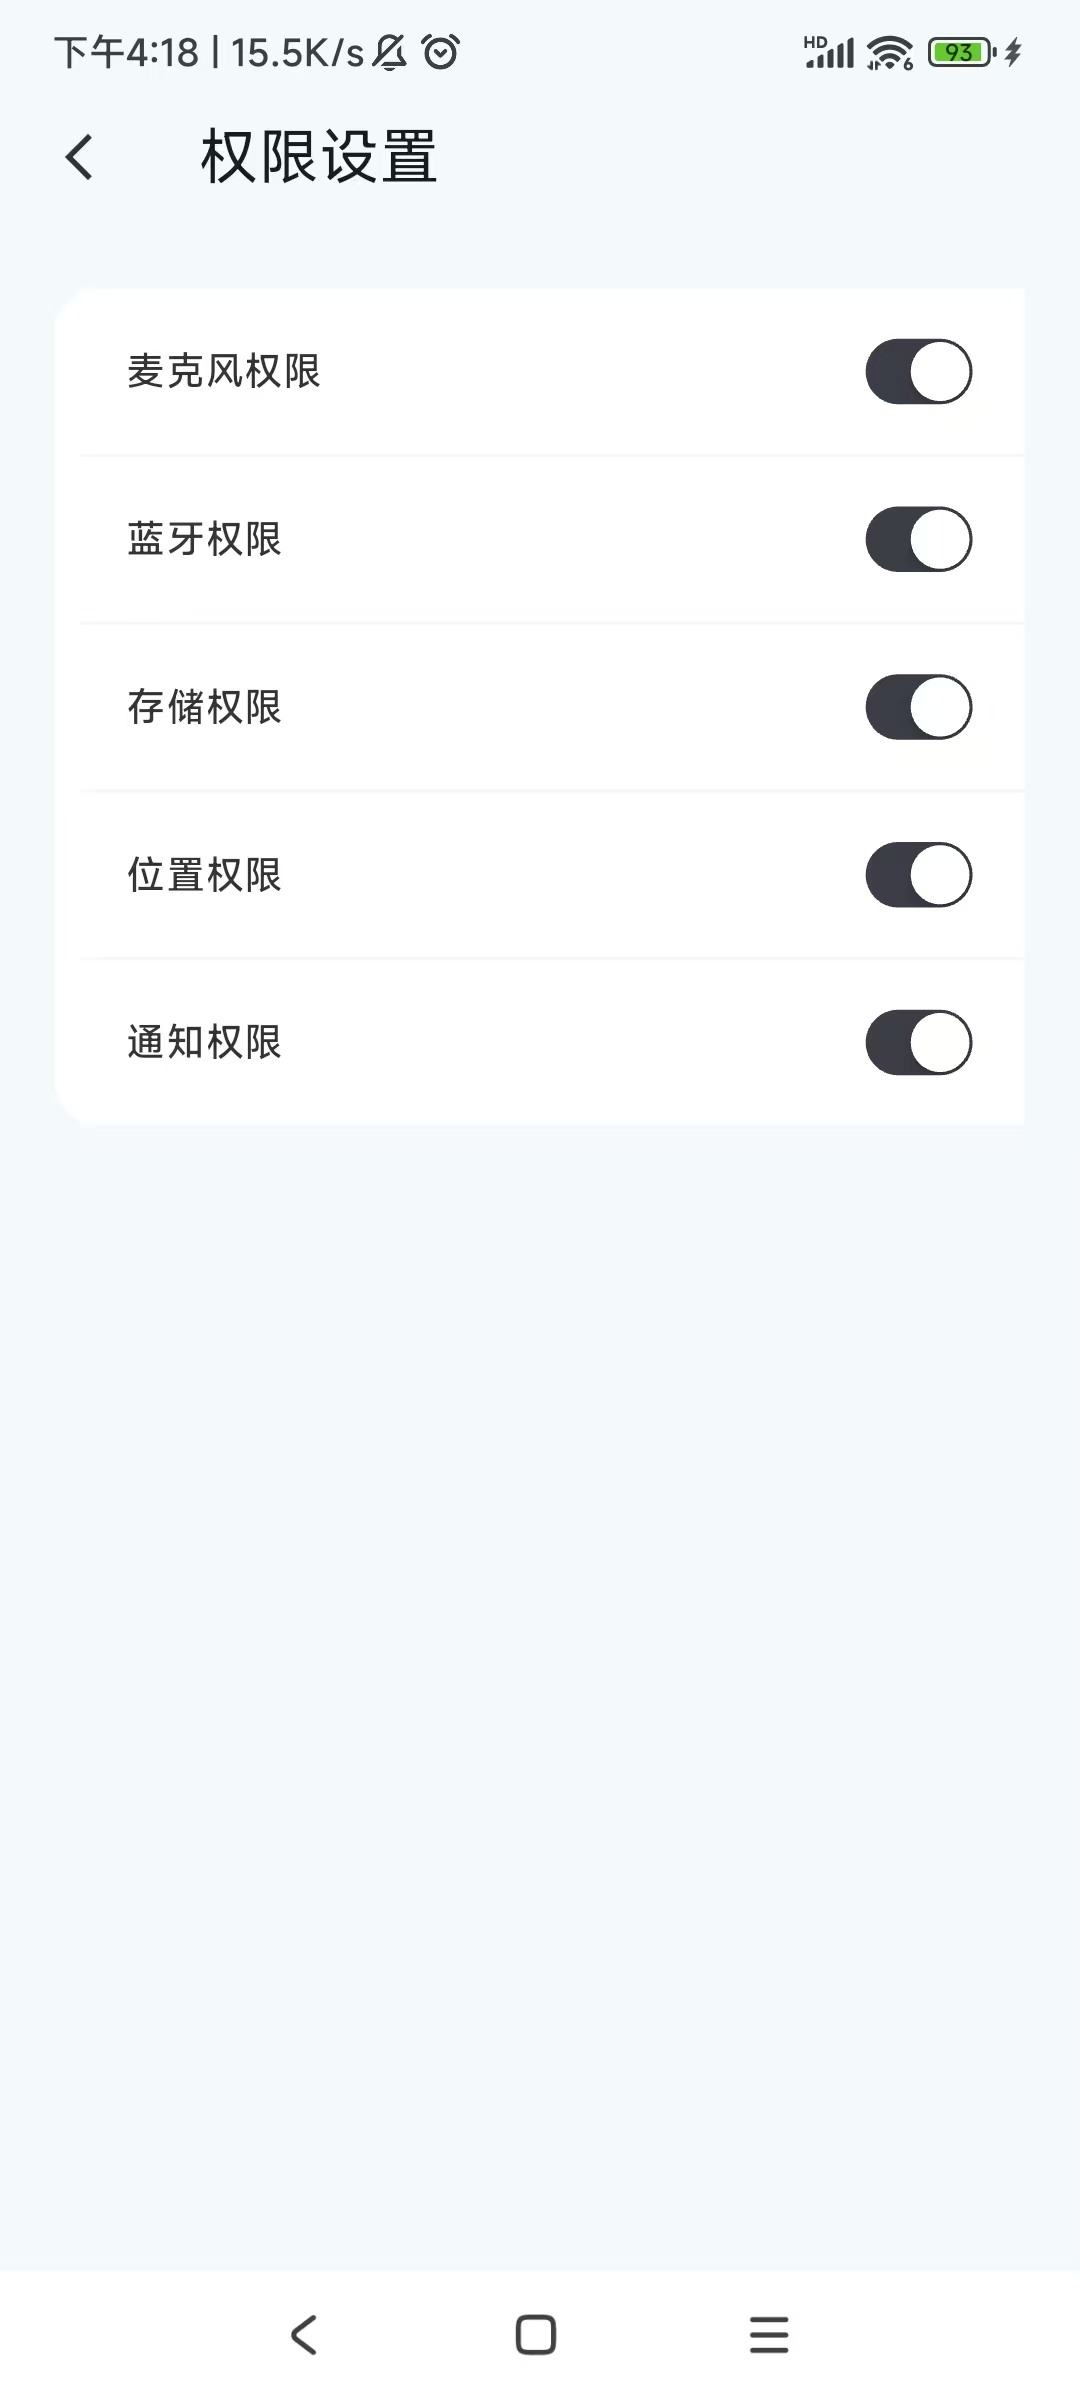
• Permission Settings: You can view the current authorization status and control the authorizations.
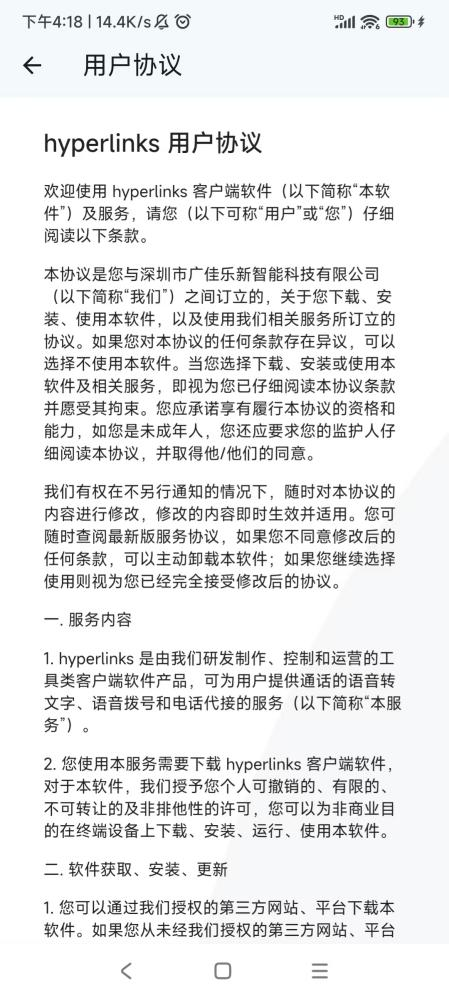
• User Agreement: Displays the content of the user agreement.
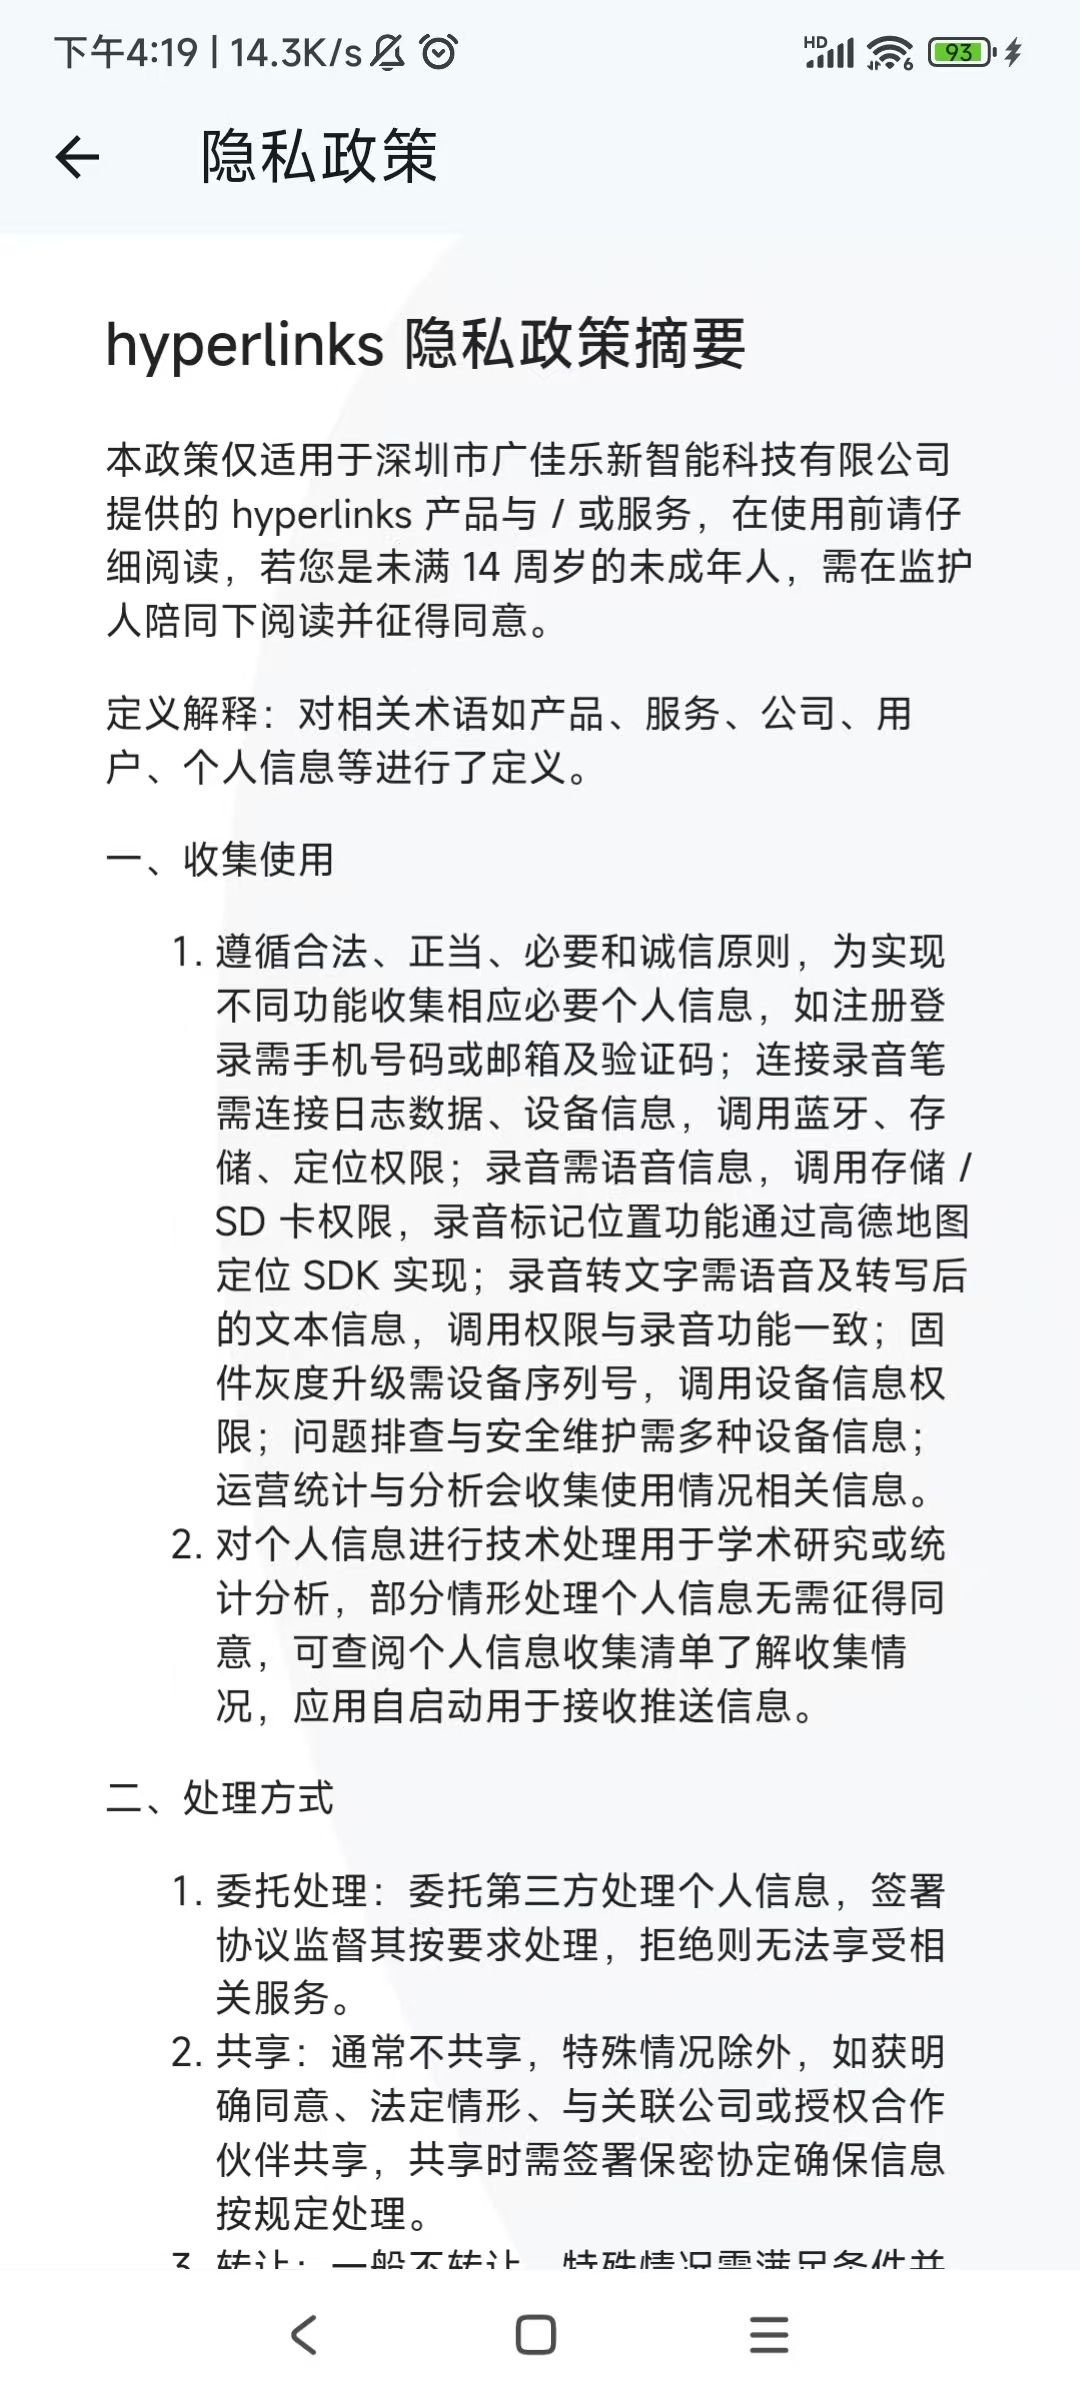
• Privacy Policy: Displays the content of the privacy policy.
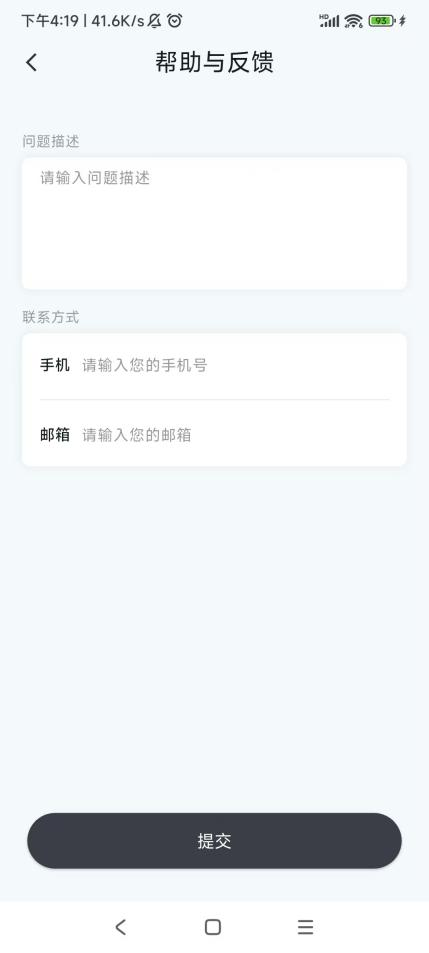
• Help and Feedback: Provide feedback on the APP usage experience and suggestions.
• About Us
• Check for Updates: Check if there is a new version of the APP.
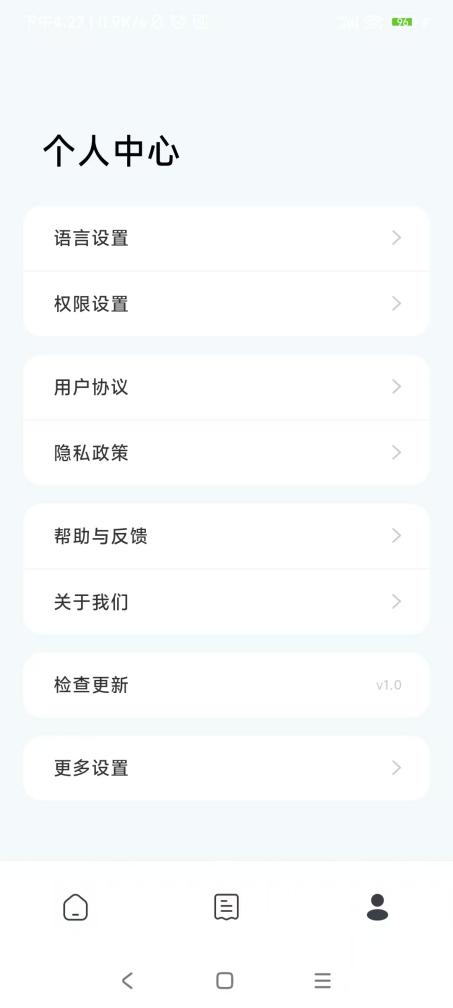
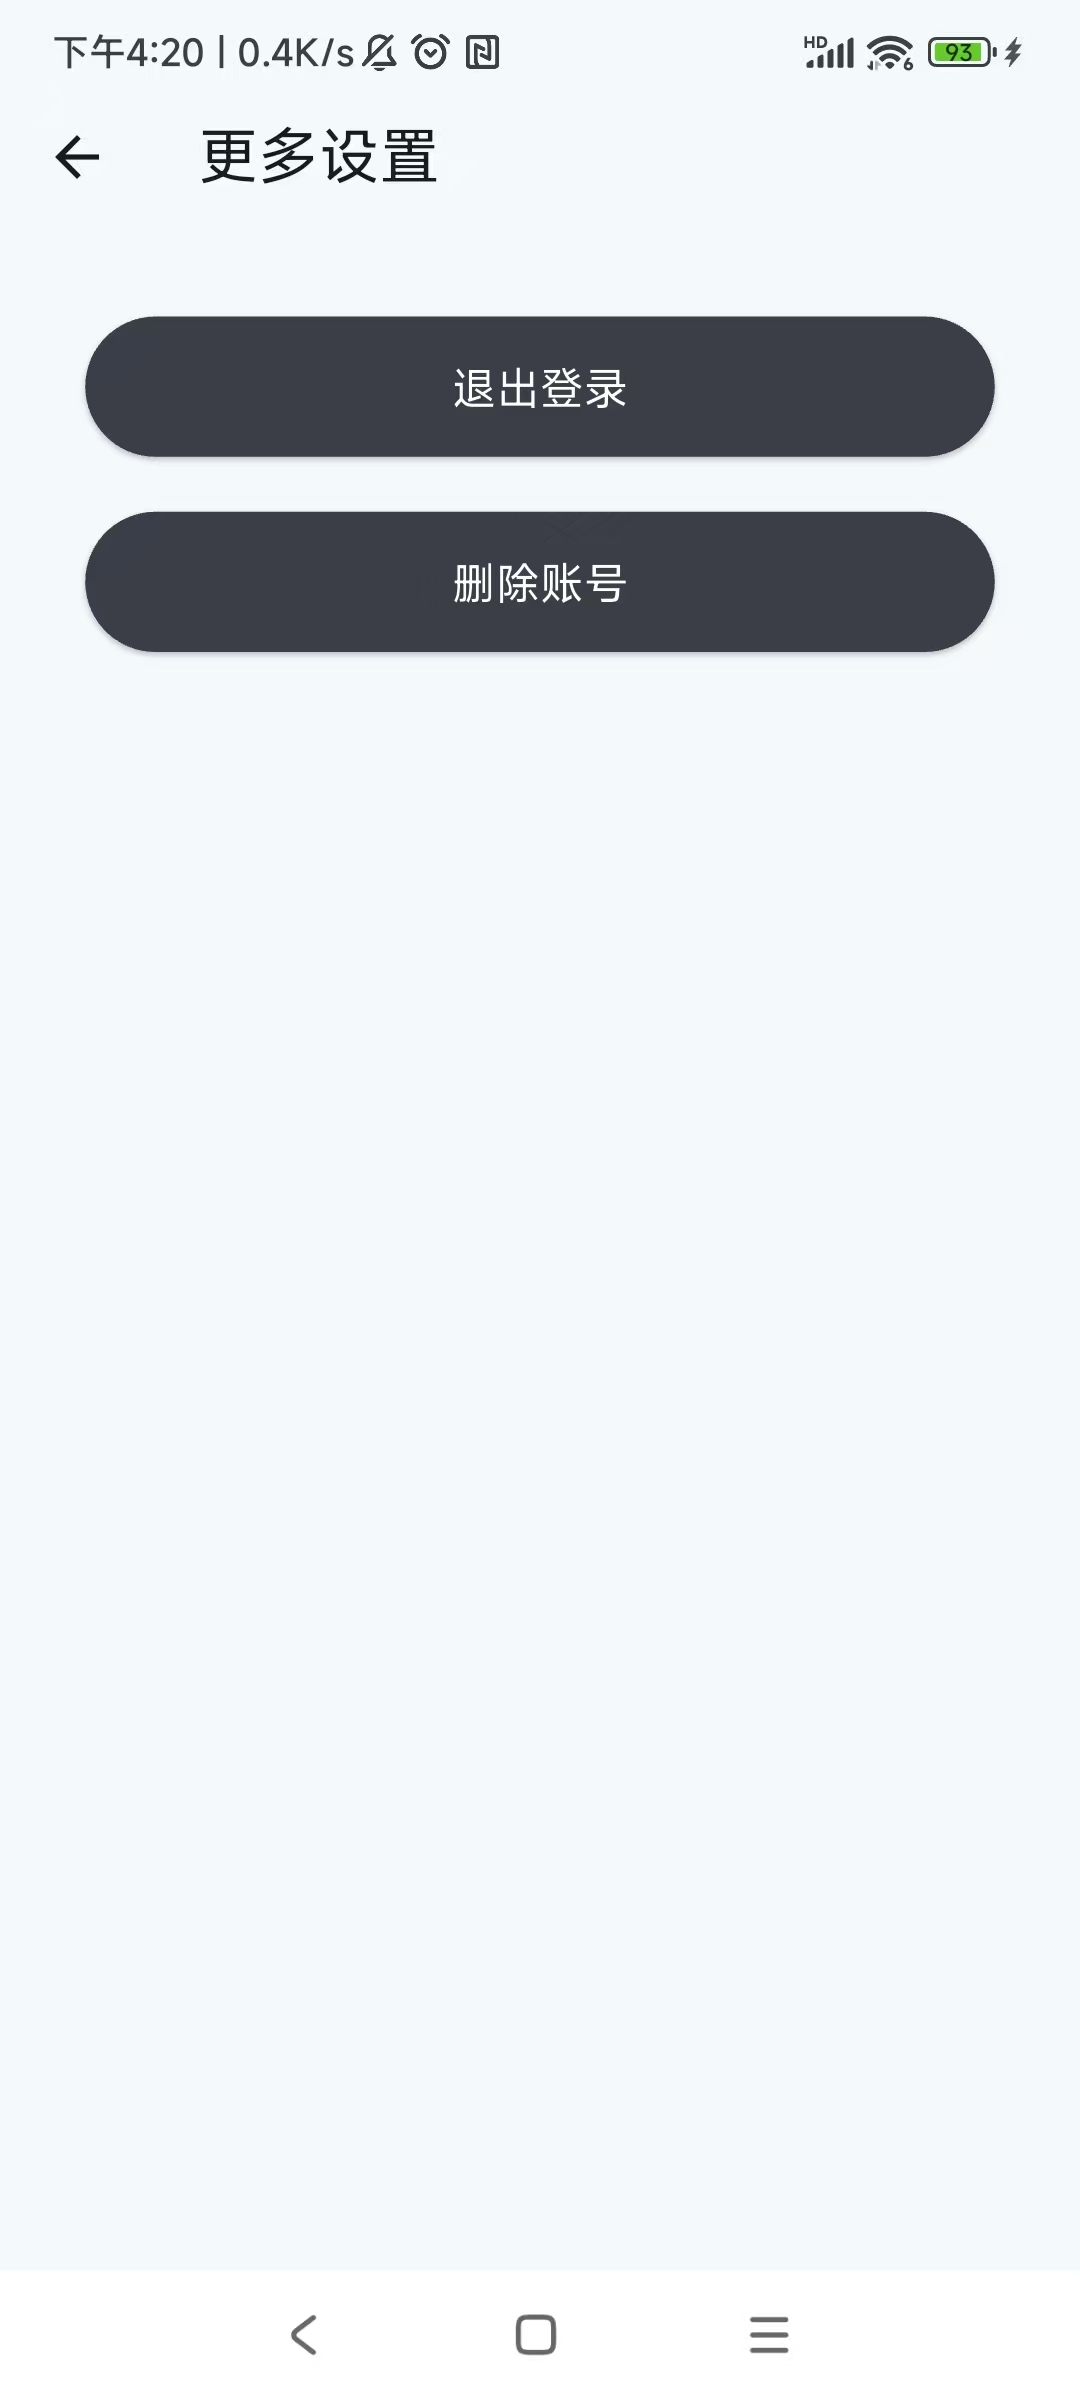
• More Settings: Log out of the account or delete the account.